Wednesday, June 25, 2014

Hand-Stitched Top with Asymmetrical Hem Skirt

So, there has been some very productive napping in our house. I began sewing this hand-stitched top and coordinating skirt two weeks ago and wrote about it here. I expected this project would take me six weeks of hand-sewing, but it went faster than I thought. I finished the top in 2 weeks putting in about 20 hours of stitching. The skirt took considerably less time, only 1 hour.

I had been auditioning a new t-shirt pattern. After not finding a fit I loved, I hit my wardrobe and deconstructed a thread bear shirt I wore into the ground. I used that as a pattern and stenciled grey jersey fabric that I  scored on one of my thrift store trips. I used silver airbrush paint and a home decor stencil my hubby purchased at a craft store. I chose a cranberry colored jersey fabric from my stash  for the bottom layer of my double layer reverse applique shirt.


Airbrushed with silver paint.

Stitching along the outside of the shapes before cutting.
I made quick work of the stitching and was undecided about the sleeve option, cap or sleeveless. I polled my friends on the Thanks! I Made Them, Sew Can You Facebook page. The responses were split and I decided to go with a sleeveless option. I planned on a straight skirt of some kind and felt the sleeveless choice would maintain the silhouette I wanted.

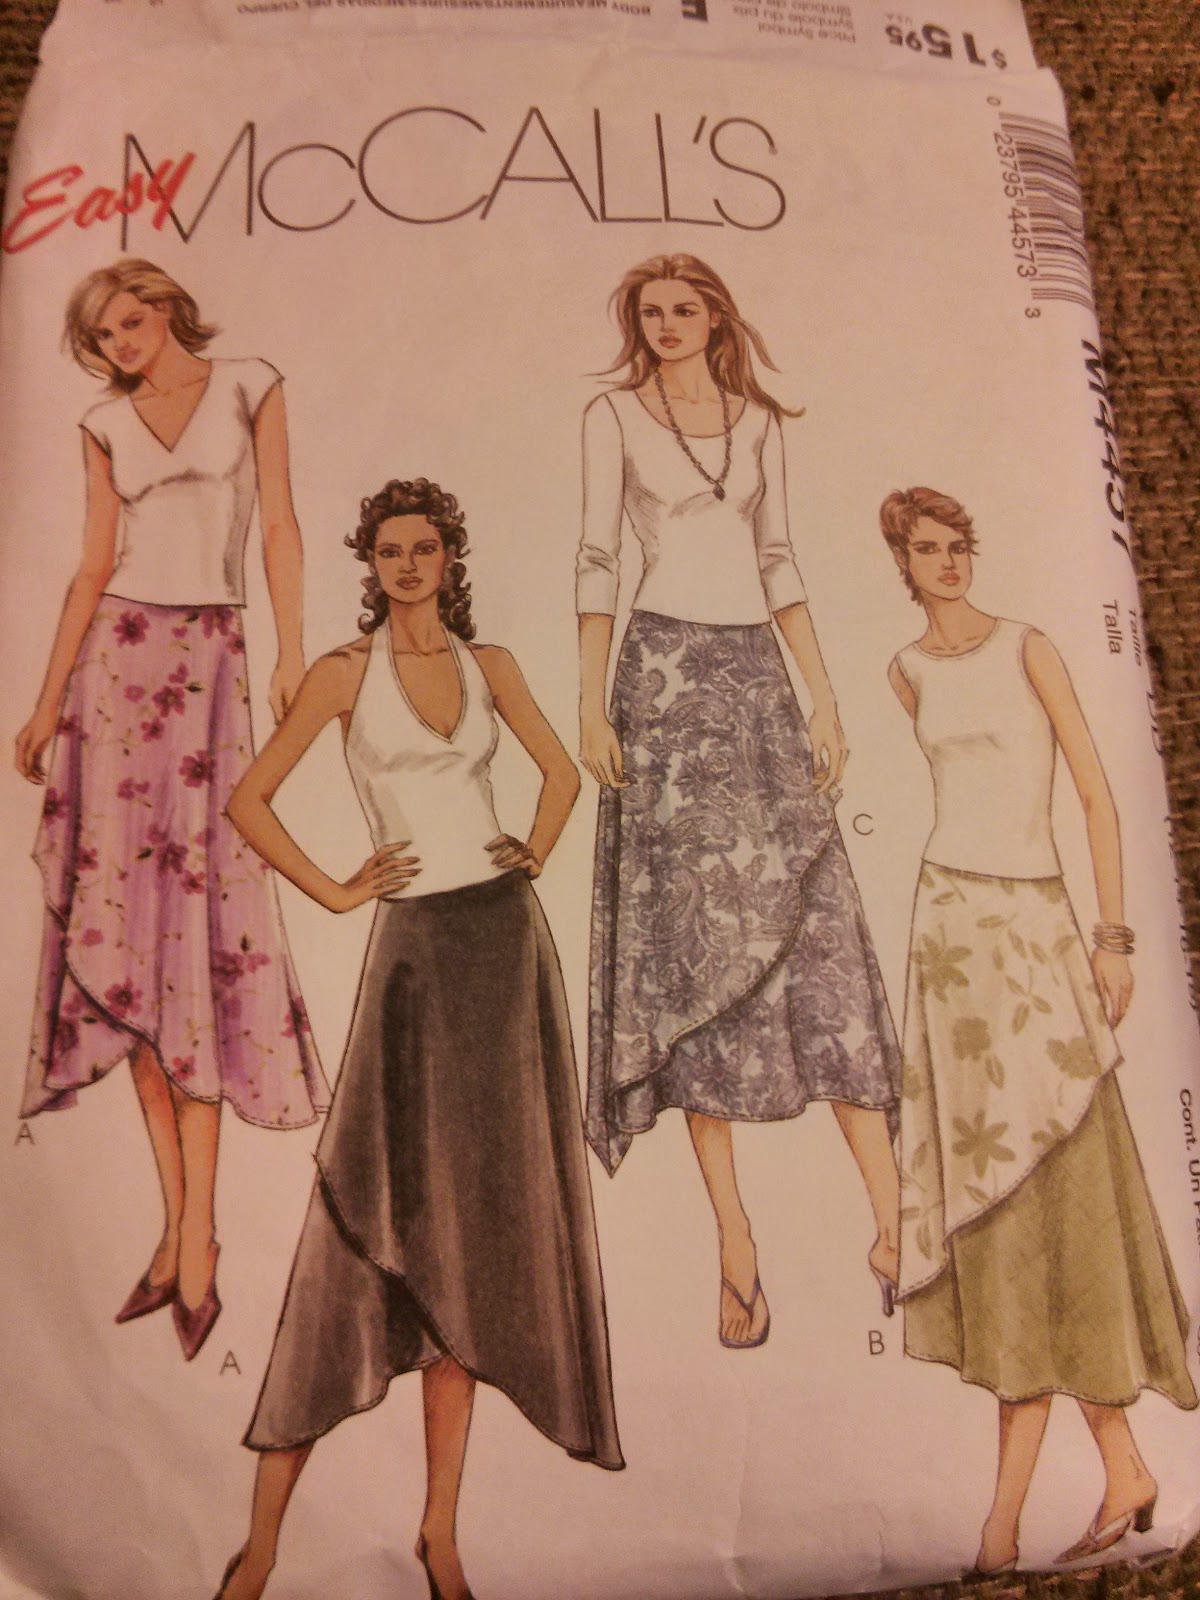
For the skirt, I explored my pattern stash and found McCall's 4457. I decided to make the top portion of view A for an asymmetrical hem skirt.


I hand-stitched the two side seams and applied fold-over elastic to the waistband using a machine applied Cretan stitch. I have a Brother SQ 9000, but other machines will have this stitch.
I chose stitch "51" and increased it to as long and wide as it goes.

The density of the double layer of elastic and jersey was the correct thickness and sewed with ease. This was so fast and easy I may never hand-stitch another waistband. I do not recommend this technique for the bindings because those layers are too thin. They are also visible and the appeal of the hand sewing would be lost.  I left the hem unfinished as it will curl with time.


Machine applied Cretan stitch on fold-over elastic waistband.


Hem left to curl with time.

Here is the finished outfit.


Skirt spun for a high-lo look.


Herringbone Stitch applied to bindings.
I am happy with this new stencil. I have some issues with it, but I want to hold off evaluating it for now. I want to paint another piece to see if my concerns will be resolved with a second run. 

Thanks for stopping by,
Bianca


Thursday, June 19, 2014

Thrifty Thursday

I enjoy shopping for fabric and patterns at resale stores and estate sales. I always feel like I am giving new life to a sewing project for someone who has passed on. The patterns are different than the current fads and the printed fabrics are usually fun. This week I have purchased some real gems.

I am a sucker for a maxi dress!

I like the bodice details here. I like the top and view A in the maxi length without the gathered panel.

Love, love, love the maxi length and those gathered pockets are too cute!

I was on the fence about this one, but I can work with it.
Now, the fabrics!
The first three fabrics can from a local resale store. The other fabrics are from an estate sale and yardages range from 2-5 1/2 yards. I give a special thank you to Rhonda and Donna at Blue Willow Estate Sales for giving me a heads up on this sale. They are great, know what I like and educate me on treasures to be found. 

Embroidered Eyelet knit

Printed linen
Batik

Houndstooth double Knit.

Floral knit

Polyester knit that would work well as a DVF wrap dress.

Rayon print I envision as a tunic with an detailed neckline...

I do not usually sew border prints. This should be fun!


Fun Print

Funny, I did not notice the stripes until I took this photo.

No plan for this beauty yet, but I love the bold flowers.
I see the irony of all this fabric accumulation on my part. I do not have enough time to make them. I can hope that when my fabric stash is being fawned over at a sale, it will be with fondness for the very old lady who did not have time to sew them all.

Happy Sewing,
Bianca

Sunday, June 15, 2014

Jumpsuit Redemption: From Meh! to Marvelous!

So, I am sure you recall my jumpsuit failure from this post. I was less than impressed with it, but was not going to give up on the jumpsuit idea altogether. I decided to give Simplicity 1355 a try. I liked the bodice of view C, but in the pants of view A.
Simplicity 1355
                  
I had a black and white rayon challis print fabric in my stash. It has a slight texture to the right side and a wonderful drape. The pattern has a lot of ease and based on the the finished garment measurement I decided to cut the size small. The jumpsuit went together relatively fast with little trouble with one exception. The armscye is very deep and wide. Have a look here:


Look how wide size small is on BIRA
I decided to make a vertical dart in the side to reduce the gap. I chose a dart because I wanted to close the distance under the arm only, not the entire bodice.This was a simple fix that required minimal seam ripping of the binding I had completed. The pattern calls for bias tape here, but I felt it would have negatively impacted the drape, so I omitted it.


I had to remove this much on both sides.
I am undecided about whether going down to a size would have eliminated the need for this adjustment. The pants portion fit fine, if a bit loose. I am undecided because of the pockets in the pants. I feel like the pockets give added bulk but limited utility. They are too shallow to hold much more than a credit card. If you add pockets to your jumpsuit, I suggest you make them deeper. That being said, in a light weight fabric better pockets will weigh them down... I am a pocket lover and say skip the pockets on this one. In the photos below, my hands are in them as far as they will go. In any case, it is not a deal breaker on style. I like the end result.


The adjustment in the armsyce was needed and worked well.

I like the simple back detail.

And the front detail.
It feels good to have successful result after the other jumpsuit. It is good to know you can go from Meh! to Marvelous!

Happy Sewing,
Bianca

Saturday, June 14, 2014

Nap time Stitching

Little Miss is 5 and Mr. Man is 2. I am a very fortunate stay-at-home mother to have nappers in the house. On a good day, I may be able to put them down simultaneously and get up to 2 1/2 hours to myself. This is not time I use to prepare meals, clean or return phone calls; it is strictly for me to do what I like. Do not judge me. It usually only ends up being about 1 hour after Little Miss pops out a few times for this and that.

While they are asleep, I dare not be in my studio. Even the quietest task will rouse them, putting an end to my brief reprieve from the overwhelming love of people who believe I can do and be anything. I instead choose to work on quite hand sewing projects. This week I completed this reverse applique tank.


After completing this tank, I was need of another nap time project. I decided I wanted to try a stencil my hubby bought me for Mother's Day. (I will tell you more about the stencil when the shirt is complete and I can give a fair assessment of it.)


Grey jersey with silver airbrush paint. I just love the look of this!
I want it in a dress with a white/heather grey backing layer. I am giddy with thinking of the perfect pattern.


Slate colored thread.

Cranberry bottom layer revealed after my first pass cutting.
This will be a cap sleeve tee with binding on the neckline. I will pair it with a skirt in the grey jersey, but I have not decided on the style. I am open to skirt suggestions. Here's hoping I have some fair nap times to complete this by mid July.

Happy Sewing,
Bianca

Monday, June 9, 2014

Meh! Cutout Jumpsuit Flop!

I had high hopes for my cut-out jumpsuit using retro Simplicity 8244. I was very excited about adding a jumpsuit to my wardobe and worked on it this weekend. Unfortunately, it did not turn out as I would have hoped. The construction was easy and the instructions clear. That was the extent of the good on this one. 


Initially, after looking at the pattern pieces, I thought the crotch would be too low and the cut-out to high, but they were fine. It turned out the shoulder seam at front and back were too low and I had to raise them by 5/8 of an inch to prevent drooping in the front. I thought the length of the legs would be long enough to accommodate moderate heels, but alas, it skimmed the top of my bare feet without being hemmed. This is a fact I did not discover until the pattern was cut. I ended up adding a cuff to the bottom to extend it. 

There were very few construction steps, so I pressed on hoping it would all come together in the end; it did not.This ill-fitting jumpsuit is not flattering at all! I almost did not post this project. As matter of fact, it is wrinkled in the photos because I left (threw) it to a pile on the floor and did not iron it before taking pictures. ;p Hillary inspired my transparency with this project by boldly posting her project fail last week (If you look at her failure, be sure to stick around and look at all of her wonderful successes). 


Here we go:
 

Meh!
 
The long darts in the back do nothing to add shaping to the back.

Possibly the only redeeming angle.
    
Seriously, look at the bunching in the middle!


You may ask why didn't I fix these problems as I went? Well, this was to be a wearable muslin to figure out any problems for future sewing. I wanted to see what would happen out of the package so to speak. Also, there were only two main pattern pieces to this jumpsuit. I could not anticipate the butterfly effect of one tweak here on an adjustment there. 

My husband likes it as does my son. Both think it is hilarious to have open "tickle access". I will wear it around the house for kicks. Life is short; it is only fabric. If we cannot laugh at our failures are we really growing?


(Un)happy Sewing,
Bianca


Wednesday, June 4, 2014

What's on my Cutting Table? A " Cut-Out" Jumpsuit!

While looking for a candidate for the PR vintage contest I found many retro patterns I want to tackle. A jumpsuit has been on my mind for some time now. I have several patterns new and old, but this "cut-out" jumpsuit from 1969 rises to the top.
 
http://k.b5z.net/i/u/6040209/i/s8244c.jpg


I like View 4, the print with a contrast bias trim and View 3, the solid version with facings. After much thought, I have decided to go with a black solid for the body and am on the fence about bias trim or facings. I have chosen to use black linen for an understated look. 


I like the idea of the print, but a print jumpsuit reminds me too much of my days as a professional clown (Yes, I used to be a clown, complete with a wooly red wig). I want to see how the solid version looks before getting too adventurous with a print. 

Stay tuned to see how it all works out!

Happy Sewing,
Bianca