Friday, October 28, 2016

A Pattern with a Purpose The Pattern Review Lillian Blog Tour

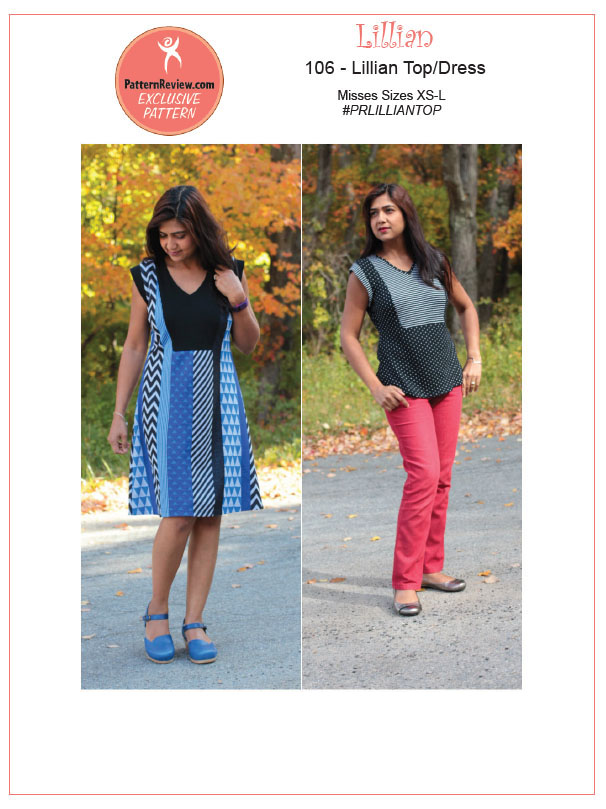
New Pattern Alert! Deepika at Sewing Pattern Review has released a new pattern, and she asked me and some talented bloggers to make it up. The Lillian is a knit top or an A-Line dress with a V-Neck Yoke and cap sleeves. The front yoke allows for subtle bust shaping as well as infinite design opportunities. The pattern sizes range from xs-plus. I made the pattern in size small for my pieces. 
        

After seeing the super easy pattern with the yoke, I knew it was the perfect canvas for a hand-sewn element. 


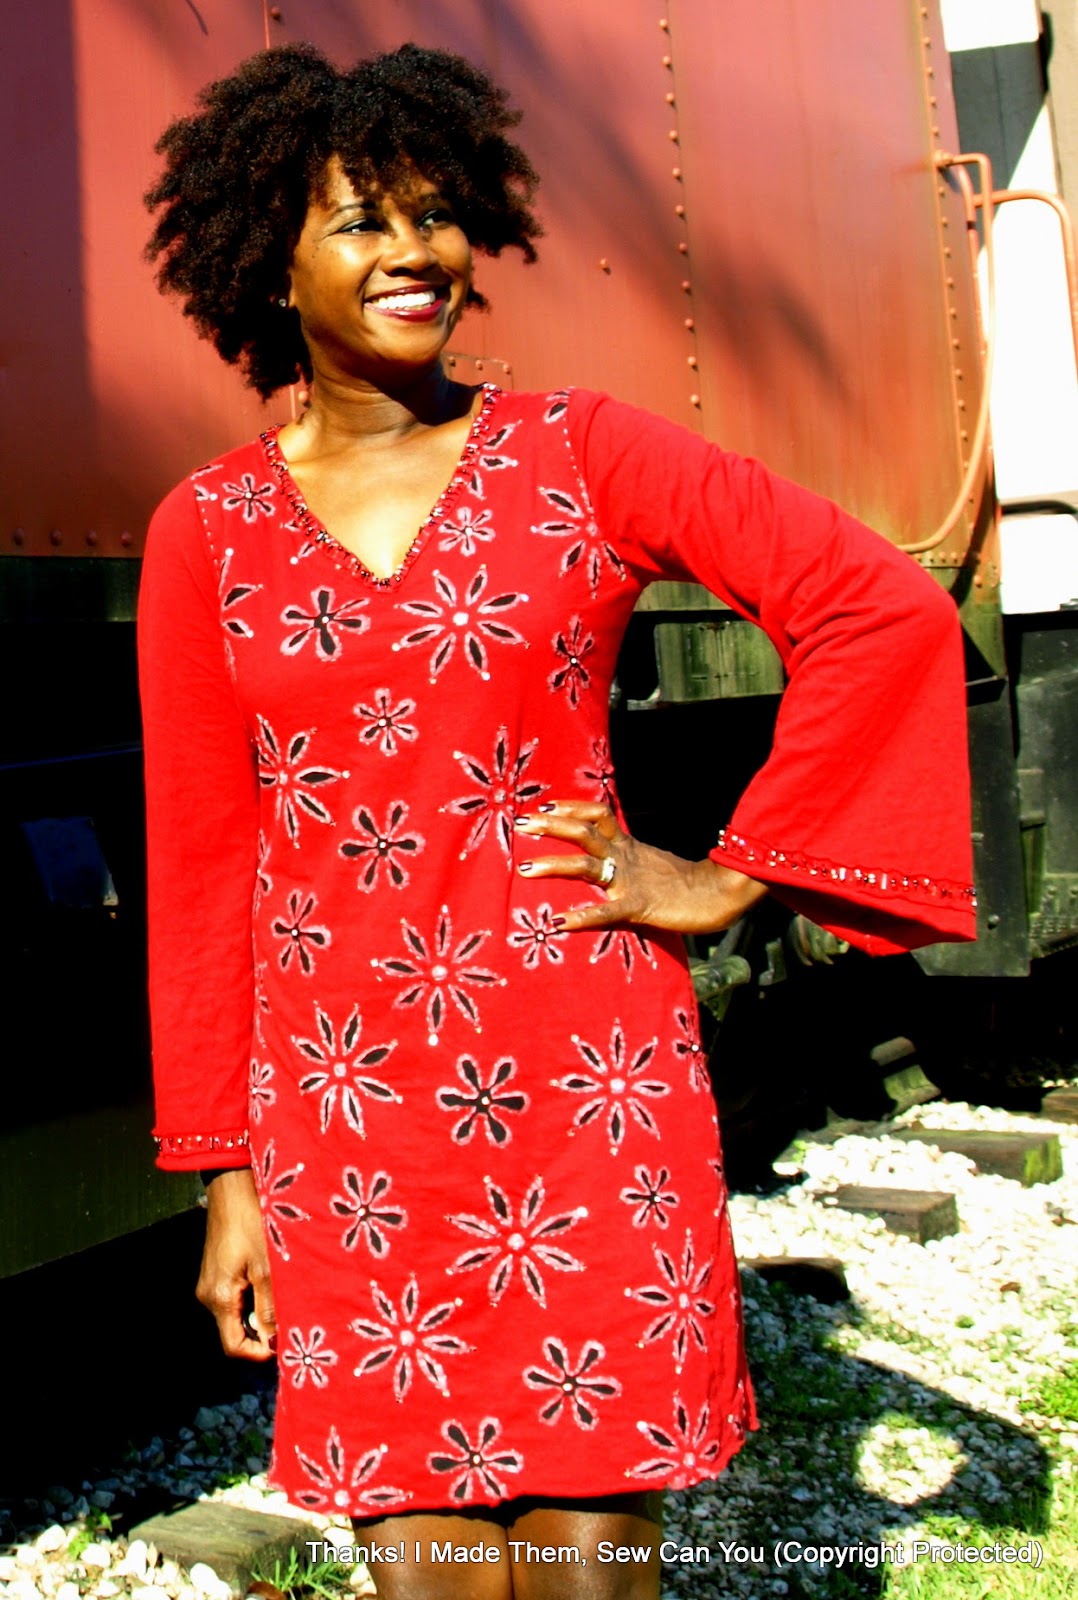
Blue is my favorite color, and I love the combination of navy and baby blue together. I stenciled using silver paint, and I stitched the layers together with slate colored button and craft thread. I secured the v-neck with a herringbone stitch from my sewing machine. I used navy thread to keep it invisible. I did not want to distract from the applique details.


This top is sewn in a single layer of cotton jersey except on the yoke that is a double layer. The seams are all felled to the back and top-stitched in contrasting thread to add more visual interest.


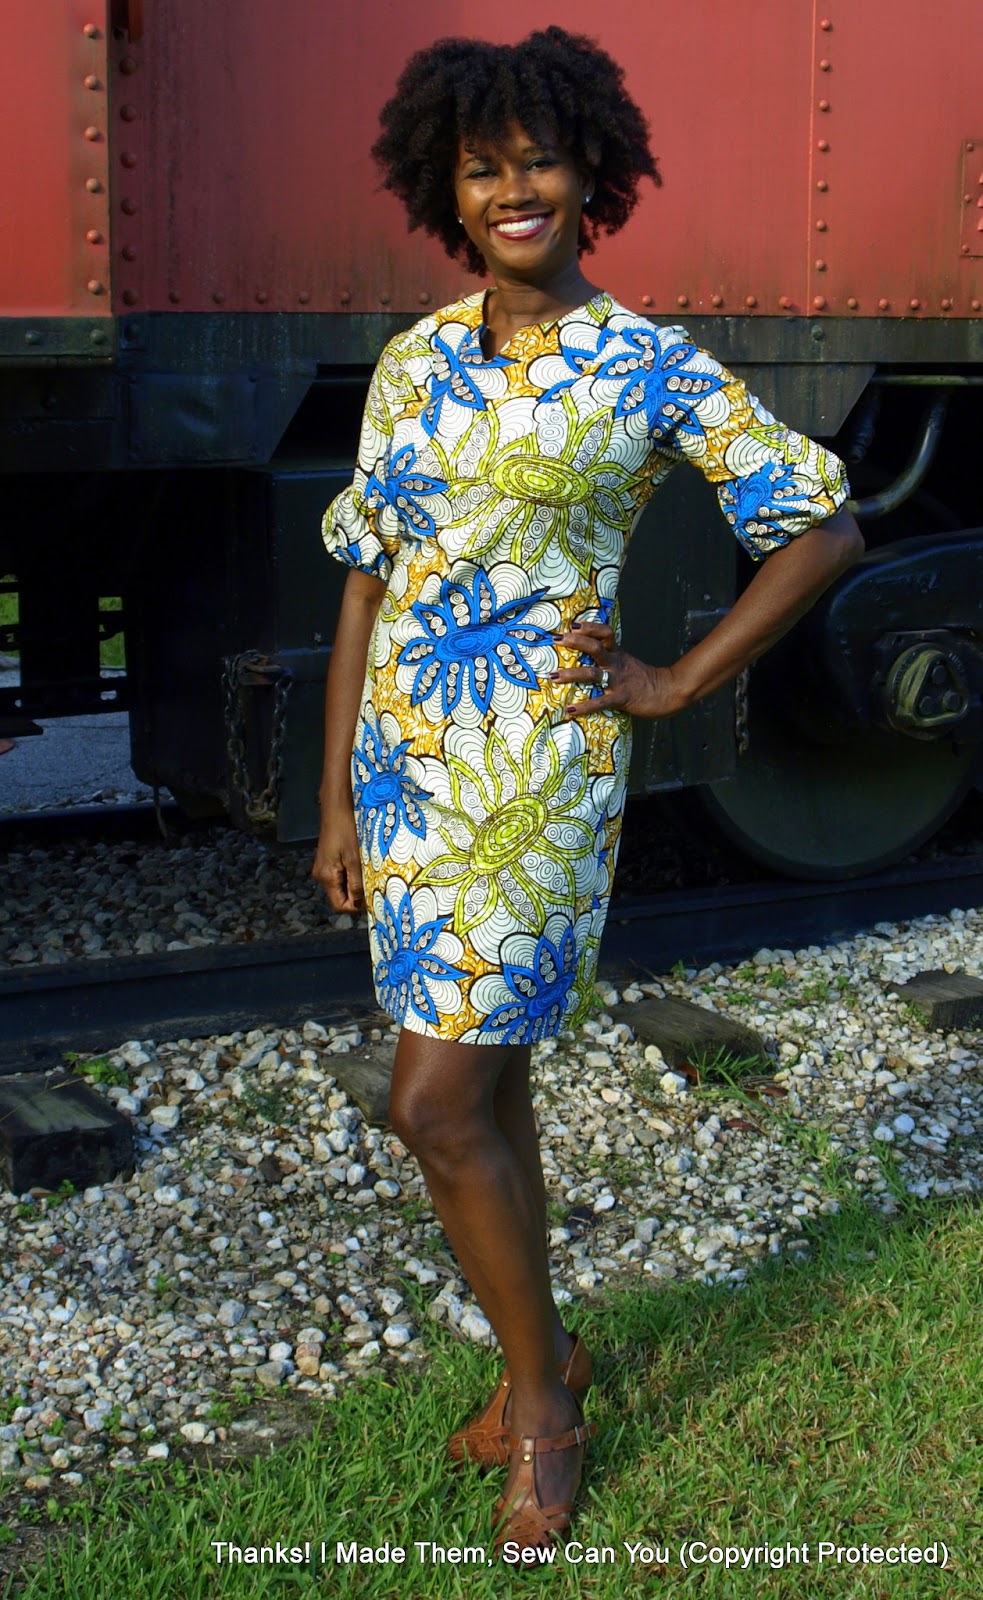
Apparently, I have a multiplication problem because I made another version of the Lillian. What is with me and double makes lately?  This time, I made the dress version. I added reverse applique to the yoke and to a section of the lower skirt.


This is a new color combination for me. I used sage green jersey for the outer layer and beige (not nude :P)  for the backing layer. The shapes of my stenciled motif are accented with gold airbrush paint. The hand-sewing was done using Dogwood colored button and craft thread. The v-neck bias strip of this version is secured using a parallel stitch. 


I started this dress on Sunday and it was done by Wednesday. Granted, I am not new to this, but even for me, that is quick. The larger scale of the motif makes this super fast to sew. The dress when sewn in regular knit fabric can be sewn in 2 hours! 


This stencil image is free in my Craftsy store if you want to give it a try. If you want to give it try, but want to save a step or 2, I have "you cut" stencils in my Etsy Store.


This pattern was inspired by Lillian Weber of Dresses for Africa and 20% of the sales will be donated to to that organization in her memory. You can read more about that here.  

I have written a Pattern review of these makes that can be read here.


Want some more inspiration to make yours? These talented sewists will be posting about Lillians on their blogs this week, so be sure to check them out.
Oct. 24th Jstarr4250 (Julie)

Happy Sewing,
Bianca

Friday, October 21, 2016

My New Favorite Maxi Skirt in Ankara Wax Fabric

                        
I love a good maxi skirt! Don't you love a good maxi skirt? I especially love a African wax print maxi skirt. I have been on the hunt for a new pattern that was beyond the basic gathered skirt with a waistband, button and zipper. I had done it, liked it, but wanted to mix it up. My search brought me to The Lorelai Skirt by Cheryl of Paradiso Designs.


This Paradiso patterns are not like commercial patterns. You cut your size by calculating a formula using your measurements. Because of this, you can be make all sizes including plus sizes. The Lorelai skirt can be made 3 styles, maxi, midi & sport. The maxi length has 2 options, with or without a patchwork or contrast inset. You can choose to add pockets or not. 

Because this is not your typical pattern, you may be intimidated by the format of the instructions. My trick was to print them, choose my option and highlight my steps and illustrations. Once you identify your choice from the others, you will be able to follow the steps with no problem.


This skirt feels really amazing! The wide elastic waistband is worn low on the hips and is close-fitting before widening at the gathered lower skirt.  


The skirt back mimics the front skimming the body.


The sides of the skirt feature super sexy yet, discrete slits up both sides. The placement reveals just enough leg and nothing more even with a gust of wind.


I always feel confident wearing what I make. Taking a piece of fabric and transforming it into something wonderful is thrilling. The combination of cut of this unique pattern, my choice of bold fabric, and styling makes me feel particularly Badass! I have been on a duo making kick lately and plan to make another soon. If you want to feel Badass too, I suggest you get this pattern. You have to provide the big ass Afro, sunnies, attitude and 1960's filter yourself though.


Side Note: I will be at the Quilt Market October 29-31  and the Quilt Festival  November 3-6, 2017. I will be helping with Paradiso Designs and The Tunic Bible (CT Publishing) as well as enjoying the show. If you see me, please come up and say hello.


Happy Sewing,
Bianca

Thursday, October 6, 2016

The Tunic Bible Blog Tour and Giveaway!


I have been a long time admirer of the work of the authors Julie Starr and Sarah Gunn. When they invited me to make a tunic from their, not then released book, I was thrilled! I initially thought I was to be a pattern tester, but learned my make would be included in the book gallery alongside other sewists I admire. I did not attend American high school, but I felt like I was invited to eat lunch at the "cool kids table"! 


When you call something a "Bible", you set the bar pretty high for meeting all your needs. This book claims to be "the only tunic pattern you'll every need! It includes a graded bodice pattern with alternate neck plackets, collars, and sleeves that allow you to tailor tunics to suit any style, length and fabric. After reading and sewing from this book, I think it lives up to its' name.

I have mentioned before that I loathe tracing patterns. I am also lazy when it comes to learning a new pattern writers process. It doesn't stop me from making them, but it does slow me down. These usual prohibitions become irrelevant with the limitless options available here. The book is visually appealing and loaded with inspiration and mixing formulas to customize your tunic.


With so many possibilities, I happily contemplated which of the many versions I would make. The beauty of this book is that even if you are not  tunic wearer, you can find a style that works for you. In the end, I chose the short tunic with the shorty placket and the ruffle sleeve.


I made my tunic in an Ankara Wax print based on my measurements with no adjustments. I love the silhouette and the way it skims my body without being to snug. I did not add a zipper when I made it last Fall. I am recovering from 2 knee surgeries since then and suffering from a lack of cardio. I may add a zipper now to help ease getting it on and off.


I was drawn to this tunic option because of this ruffle sleeve. It's construction is like none I have done before and I love the structure it has. It is poofy and stable at the same time! 


I considered a contrast placket, but decided I wanted to showcase all of the wax fabric. This would be fun with contrasts on the ruffle and placket don't you think?

When Julie asked me to make a tunic, I immediately thought of the possibilities of a jersey hand-stitched version. The time-frame was too tight to make the book gallery deadline, but I knew I had time for the book release.


I made this hand-embellished, hand-sewn tunic using the V-neck placket and slim sleeves tapered to the wide width. I stenciled and airbrushed the front fabric using my flower stencil before sewing around the shapes to secure the red layer to the black. I then removed the middle of the shapes to complete the reverse applique technique.


I stitched red and silver sequins at the ends of the pointed stars for some sparkle. To guild the lily, I added an exposed bias neckline secured with random beaded parallel stitches along the neckline.


I added a 1/2 inch fabric strip along the wrists and secured them with more random beading to mimic that of the neckline.


The wrist and dress hems are left raw and unhemmed. They will curl in time adding more texture. 


These tunics are unbelievably comfortable and easy to wear. Now that the pattern is traced, I am sure to try the other variations. I have my eye on a maxi length version next.

Ever generous, Sarah and Julie are giving away a copy of  The Tunic Bible to one lucky reader. The contest is open everyone nationally (hard copy) and internationally (digital copy). I will also give the winner an stenciled image felt version of this flower stencil. The 18in. x 12in. firm felt is painted with the design and just needs to be cut so you can get started. 

Enter here:
a Rafflecopter giveaway

To continue the blog tour be sure to visit the other bloggers.

October 3
October 4
Cloning Couture www.cloningcouture.com
Generation Q Magazine www.generationqmagazine.com
October 5
Oonaballoona www.oonaballoona.com
Featherstitch Avenue www.featherstitchavenue.com
October 6
October 7
Sew Busy Lizzy www.sewbusylizzy.com
Jennuine Design www.jennuinedesign.com
October 8
Inside The Hem www.insidethehem.com
Girls in the Garden www.girlsinthegarden.net
October 9
My Love Affair with Sewing www.myloveaffairwithsewing.com
October 10
Evolution of a Sewing Goddess www.evolutionofasewinggoddess.blogspot.com
Creating in the Gap www.creatinginthegap.ca
October 11
House of Pinheiro www.houseofpinheiro.com
The Tunic Bible www.thetunicbible.com
Happy Sewing and read your Bible,
Bianca