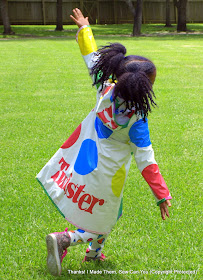
Ever since I made my Twister Poncho a few years ago, she has been asking for her own. I resisted until now because my poncho was large enough to cover me and both kids easily.
Everyone is getting bigger so it was time to make hers. I have been steadily collecting Twister games from resale stores when I come across them. They are available in retail stores, but you can't beat a resale price and opportunity to upcycle an item that may be one step from the landfill. I needed two for my adult poncho and two for hers, but one would have enough for her. I chose two because of design decisions I made.
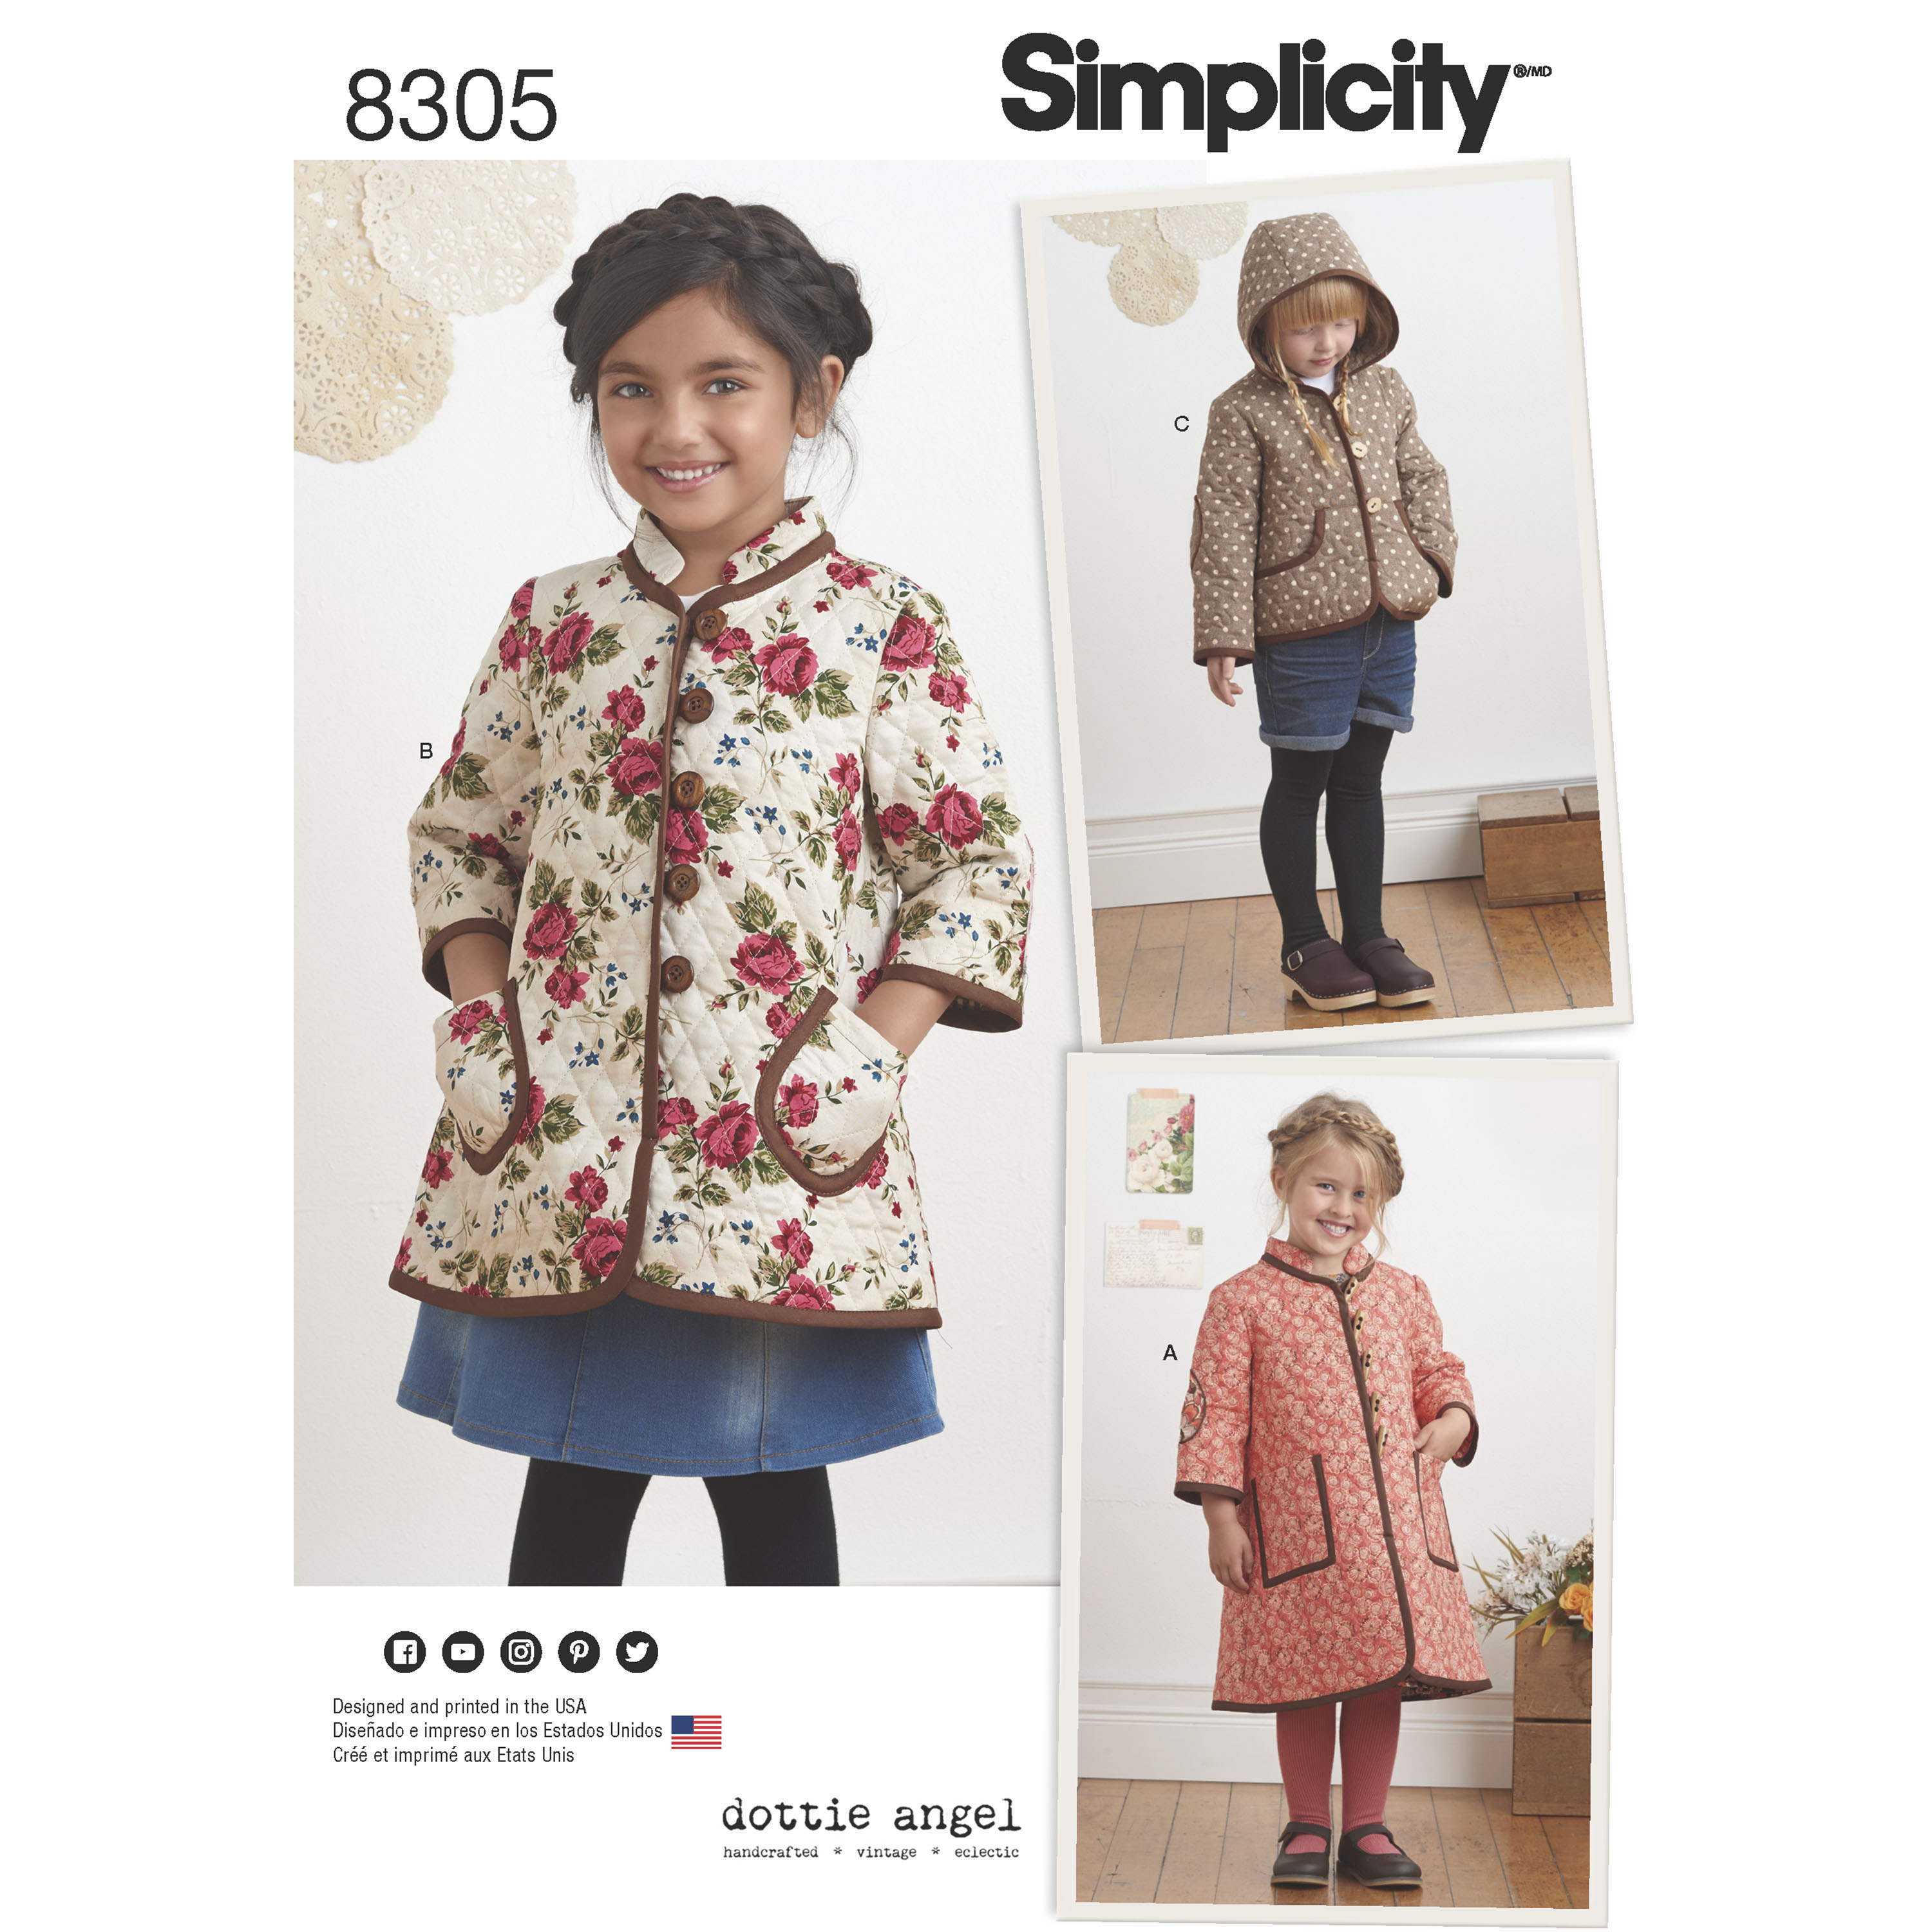
I used Simplicity 8305 for this project because it didn't require much modification to make it a raincoat. It is a combination of view A and C with modified the pockets.

Working with the Twister mat requires a bit more focus and a few more tricks than working with fabric. You don't want to melt or tear the plastic. Ripping seams due to mistakes will result in many perforations in the seams so I had to take time. This was not a fast, complete in one sitting make. It took about 2 days of work to come together and we love the result.
I learned a lot from making the poncho for myself and customers. I took those lessons and added fun touches to this raincoat.
Little Miss is enjoying a summer of color with purple dyed hair. I took advantage of her love of color and added them every chance I had.
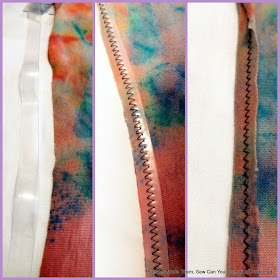
The first added color feature is multi-colored bias binding with rainbow color thread stitching
To make the multi-color binding:
To that, I also added mismatched buttons and button loops
I really like the three-part hood of this pattern. It allowed me to showcase key aspects of the game mat.
A "Stockin' Feet Game"

Working with the Twister mat requires a bit more focus and a few more tricks than working with fabric. You don't want to melt or tear the plastic. Ripping seams due to mistakes will result in many perforations in the seams so I had to take time. This was not a fast, complete in one sitting make. It took about 2 days of work to come together and we love the result.
- Toss it in the dryer on express cycle with a damp paper towel to get the wrinkles out before cutting. Check periodically to make sure it isn't too hot.
- When pressing during construction, press the lining side with a low iron
- Underline the Twister fabric with lining fabric so they behave as one. I used four colors of thread and my serger for this.
- Use clips instead of pins to hold the fabrics together
- Sew with jersey/ball point needles or any with a fine point
I learned a lot from making the poncho for myself and customers. I took those lessons and added fun touches to this raincoat.
Little Miss is enjoying a summer of color with purple dyed hair. I took advantage of her love of color and added them every chance I had.
The first added color feature is multi-colored bias binding with rainbow color thread stitching
To make the multi-color binding:
- Begin with purchased extra wide double fold bias tape
- I cut 12-inch sections of all of the colors
- Open the ends and pin, right sides together, raw edges even
- Stitch the ends together
- Press seams open
- Refold along original foldlines and press
To that, I also added mismatched buttons and button loops
Alternately placed bias-trimmed pockets
I really like the three-part hood of this pattern. It allowed me to showcase key aspects of the game mat.
A "Stockin' Feet Game"
"The Game That Ties You Up In Knots"
I am ridiculously thrilled with the lining fabric and how perfect it is for this project! I love the primary color hand prints on this fabric that I got at an estate sale. It is perfect for a Twister raincoat!
It is hurricane season in Texas, so I know the rains will come. In the meantime, a little plea to the sky cannot hurt right?
Happy Sewing,
Bianca


