Showing posts with label stencil. Show all posts

Thursday, October 25, 2018

Spruced Up Waxed Canvas Jacket


Have you sewn with waxed canvas before? I love the look if it on bags and jackets and bought some wax with the plan of treating fabric to make my own. The wax and fabric have remained untouched in my sewing room since December waiting for the motivation to begin the work.


Fabric Funhouse, my source for cork fabric, now sells high quality waxed canvas in a range of colors.  


I was approached by the company to make a jacket for their booth at the upcoming The International Quilt Festival in Houston. Because they are awesome, I agreed. I could not decide which color I liked best, so I asked them to surprise me with whatever they wanted. They chose well and I was sent the fabric in a rich garnet color. It is a color I love and wear often in my lipstick.

As you all know, I love fabric painting and bold prints; I rarely wear solid colors. I read on the website that the "wax does not transfer or migrate onto other fabrics, leathers and your designer linings." This gave me the idea that the wax permeates the fabric, rather than sit on top of it. I figured it would respond favorably to stencil painting. It was a risky proposition because typical printed waxed fabrics have the wax added after the print is laid. After a couple of successful test swatches, I was convinced I wanted to do it.

I usually like to airbrush paint my fabric. In anticipation of readers wanting to try this technique, I opted for a more accessible paint method. I used 4 cans of Tulip Color Shot Fabric Paint in Pewter Shimmer. It is available on amazon and in craft stores. If you follow me on Instagram, you know the saga and my hoarding of this now discontinued color.


I painted the design of my new Cobbles stencil on the cut fabric pieces of a modified Simplicity 8298. To maximize efficiency, I stitched three of my felt stencils together along the long edges to make a larger stencil. I applied a light layer spray adhesive to the back of the stencil before setting it on the fabric. This helps give sharp edges to the motifs and prevents paint for getting under the stencil during spraying. The paint was applied in multiple light layers to give even coverage. After completing an area, I re-positioned the stencil, covered the already painted area and continued painting until done.

When working with waxed canvas, special considerations are needed. A full list of care and considerations can be found here, some bullet points are below:
  1. Expect creases, cracks and texture on the fabric surface
  2. Use clips, not pins to hold your fabric
  3. Use a press cloth and clapper if you must press it
  4. Press on medium heat
  5. Use a size 100/16 or 100/18 needle
  6. Use at least a 3mm stitch length and heavy duty thread
  7. Clean your machine to remove any build-up after and replace your needle                                          
As I mentioned, I modified Simplicity 8298 for this jacket. It is written for  pre-quilted fabrics, but I liked the simple shape and minimal seam lines so I tweaked it to work for this. I opted to make a lined version of view C with the length of view A. I added side seam pockets instead of the visible ones given.

                      Image result for simplicity 8298

I basically made an exterior from the canvas and another from a basic black broadcloth. I get confused every time I do it, so I refer to the bagged lining method demonstrated on this blog


It makes for a clean finish on the inside and out.

 
I am really pleased with this jacket! I tested it on a rainy day and its water repellent qualities worked like a charm! The paint is durable and was worth the gamble. I feel like stencil painting opens up so many design possibilities with this fabric.


I cut the size medium based on my measurements. Because I did not use prequilted fabric and the stiffness of the canvas, I think it looks a smidge too big in these photos. That being said, it feels comfortable to wear and I am certain with fall layering it will be fine.  


If you will be at Quilt Fest, you can see this jacket close up at the Fabric Funhouse booth. I will be out and about when not helping at The Paradiso Designs booth (947). If you see me, please say hello. 

Happy Sewing,
Bianca

Monday, February 26, 2018

First Coffee, Later Cocktails!


Hello Friends! I am back from a temporary sewing break. After a two-year struggle with knee injuries and multiple operations, I recently had another and hopefully my last. I was at my peak fitness and health when I had my first injury and both have been on the decline since. It has been a discouraging season and this recovery, the most difficult. Post-op, I have been in a knee brace, on crutches, and using a walker for the limited movements I am allowed. Weight and movement restrictions along with pain management, have limited my sewing during this time. 

In anticipation of this surgery and my limitations, I prepared a few hand sewing projects to work on while my right knee is immobilized. This preparation has saved my sanity many days over the past 6 weeks. Last year, I received an invitation to participate in the Day and Night Dress Challenge hosted by Elizabeth Made This. I was happy to take part and loved the dresses I made then.

When Elizabeth extended the invitation for the challenge this year, I did not hesitate to accept it. This year, we are tasked with making a dress suitable for a coffee date with friends and another for cocktails. When I accepted the invitation, I wasn't sure how I would make it work with my restrictions, but I knew I wanted to try. 

I really enjoy slow-stitched and hand-sewn projects. After investing much time and money in books and classes, I decided to no longer support, and buy from Alabama Chanin. Since then, I have been looking for a new supplier of organic cotton jersey fabric and stencils. In my new role as the Nature’s Fabric brand ambassador, I feel in love with the  wide range of regular and organic cotton jersey fabrics available. I was excited to try them out and knew a slow-stitch project in this down time would be perfect. 

Here is my coffee date dress.


I love the lines of Butterick 6241. I chose this pattern because the center panel was a perfect canvas for an embellished accent. The lines of the sleeves, bust, center back seam and pockets were perfect for top-stitch highlighting. I thought the zipper and collar would distract, so I omitted them.

                Image result for butterick 6241Image result for butterick 6241

I used "Graphite" jersey for the exterior of the dress and "Sun" for the background color. I love this color combination and happiness of the yellow. This organic cotton jersey is great! The colors are strong and the weight has nice drape without being clingy. The combination of the two layers is firm without being rigid.

                                                               
I have been learning to use a laser cutter and making my own stencils! I used it to paint the motif using a light grey fabric paint before sewing the layers together with white button and craft thread.


 Once all sewn, I removed the middles to reveal the color beneath.


I love the large pockets and accents of the top-stitching on the flat-felled seams.  


Despite the hand-sewing, it sewed up faster than I expected and is very comfortable to wear. The fabric is a dream to sew and I loved how this dress turned out. I was so pleased with it, I made another! 


This "Heather" grey and "Graphite" version is sewn with an applique technique with the same stencil and white fabric paint.


With this technique, after stitching, the outside of the shapes are cut out leaving about  1/4 inch of the fabric beyond the paint. When washed, the raw edges will curl adding to the texture of the shapes.


The neckline is finished with a folded bias band that is top-stitched down. The sleeves and hem are left raw and will roll when washed.


How fun are these over-sized pockets? They are perfect to hold the many things I "have" to take with me as I move from room to room on crutches.


This dress is heavy in my rotation. As I make more stencils, I will be making many more. If you would like to make an embellished garment like these dresses, it is surprisingly easy. You can buy a laser cut stencil in my Etsy store. It includes a PDF with the step-by-step instructions for the applique and reverse applique techniques. Now until March 3, use code COFFEE20 to save 20% on all of my Etsy stock.

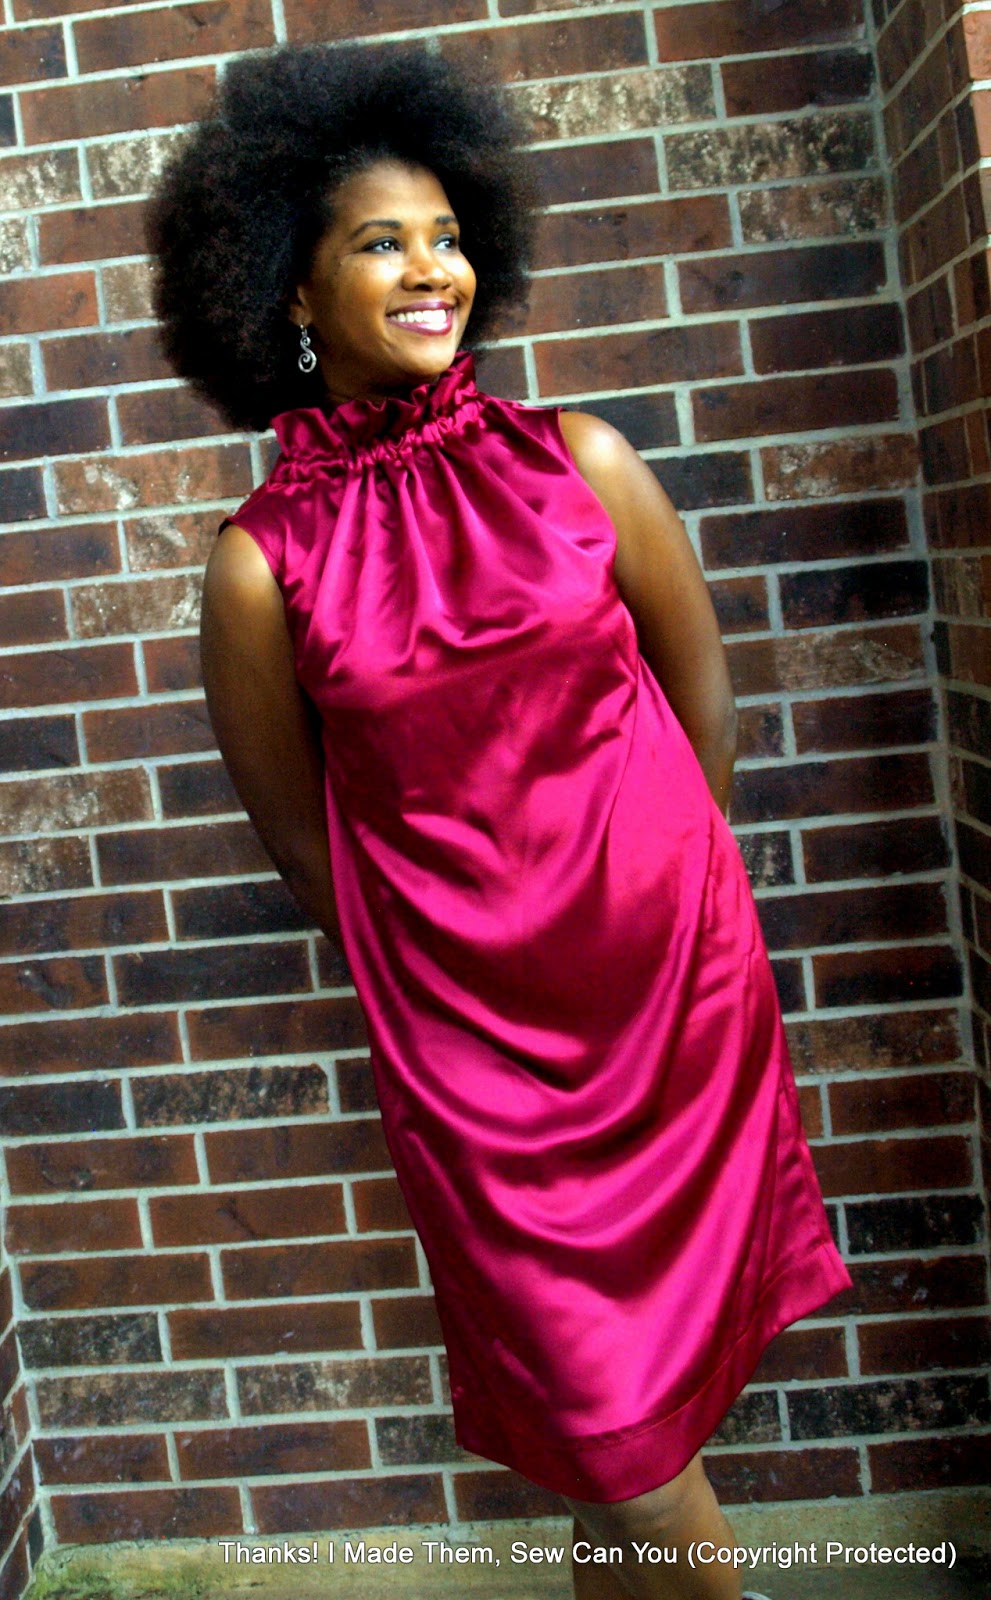
For my cocktail dress, I really wanted to make a fun and flirty dress in African Wax fabric (because WAKANDA FOREVER!). Given my physical limitations, I went with a simple dress that required little machine sewing.   


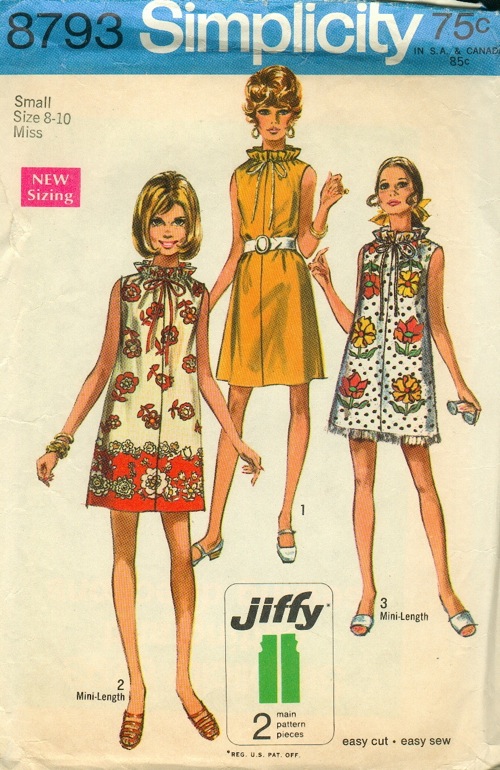
I love the paper bag neckline of this Jiffy Vintage Simplicity 8793 pattern. 

             Image result for Jiffy Vintage Simplicity 8793
It has as basic silhouette, but some drama at the neckline. I paired it with a cranberry colored satin that picks up the light just right.I did not want the tie or seam in the front, so I  made a minor change to the pattern. I cut the front on the fold and left an opening for the drawstring in the back. 


I made a contrast tie with an African Ankara fabric (because WAKANDA FOREVER!)


If I have the rare impulse to be subtle...


 I also made a tie with the same cranberry satin.


Please ignore my wrinkles. It's hard to iron propped on crutches.

Not only has this challenge given me a chance to make three new dresses, it has done so much for my mental state while laid up. As I stitched, I was reminded of the therapeutic benefits of making. I have been inspired by the dresses made by the other bloggers/vloggers participating in this challenge. Be sure to visit Elizabeth Made This to see them all. The community part of the challenge begins soon and there are many prizes to be had. One of my High-Functioning Sewciopath t-shirts will be given to a lucky participant. I hope you join the fun.

I want to thank those of you that sent me well-wishes through social media and  physical cards. It was a virtual hug that boosted my spirits more than you can ever know! I appreciate you so much!


Happy Sewing, 
Bianca
(Someone please hand me my walker; the photos are done!)

Friday, February 17, 2017

Machine Sewn Reverse Applique Wrap using Terial Magic

I have discovered magic, Terial Magic that is.


At Quilt Market last Fall I was introduced to Terial Magic a liquid fabric stabilizer that makes knits behave like a woven. I was so excited to hear what this product could do that I participated in a live product demo. Seeing the potential for speedy reverse applique I shared my plan with Laurie, the demonstrator and brand manger. She asked if I would be interested in a collaboration to show how I would use the product.

Today, I am the guest blogger on the Terial Arts blog. Pop over there to see the steps I took to make this fast and easy reverse applique project.


What I love is, the treated fabric becomes stiff after the application of the Terial Magic allowing the wrap to be sewn on a home sewing machine. This drastically reduces the time and effort involved in completing a project like this without hand-sewing. 


To further test the possibilities of this stabilizer, I sewed the motifs using silver metallic thread. I loaded it as normal and took no precautions against twisting, breaking or bobbin tangles I have heard occurs with metallic thread. There were no issues at all with the treated fabric! 


I am so thrilled with the end result. This wrap stitched up quickly and could be done in a week of evenings with no stress.


 Be sure to visit the Terial Magic page to find out how you can make your own.


Happy Sewing,
Bianca

Thursday, August 13, 2015

Hand- Sewn Reverse Applique and Applique Tops with Free Image Download.

I wish I was a regular yoga exerciser. I like the idea of being the type of person that is zen. meditative and relaxed. I own a yoga mat and I've attended a few classes. Every time I do I realize it hurts it's not as easy as it looks and I would rather sweat hard for 30 minutes then be silent for an hour.

I recently had reinvigoration of the idea of doing yoga. There I was, downward facing dog, staring at my yoga mat. Sweat beading on my brow, wondering if I would get to the point when this would be fun. Suddenly, it hit me! The mat I have been staring at would make an excellent stencil! With a blast of creative inspiration, my burning limbs and taut muscles suddenly did not hurt so much. 

Using the stencil making steps I previously wrote in this post; I got to work. I photographed my mat and manipulated the image in Publisher to get the 18in x24in image to use as my stencil image (Thanks Dr. Fun).  


I decided to use my stencil for shirts hand-sewn in reverse applique and applique techniques on cotton jersey. I will show the reverse applique shirt to begin with. I decided to use my trusted vintage Simplicity 9300 pattern that I used to make a halter top.


I have an airbrush and love the results painting with it produces. It is however, 100+ degrees in my Texas garage. I was not willing to spend any time in there to paint fabric. I also know you may not have one, so I wanted to show an alternative. 


I applied a light layer of spray adhesive to the back of my stencil and positioned it on top of my fabric. This helps me get crisp edges around the shapes and helps the stencil stay in place when using an airbrush.  Using a 3-1, paint to water ratio, I thinned it out a bit. Using the paint as is, makes the fabric less flexible than I like. (Okay, I really didn't use that ratio. I just poured about an inch and a half into another bottle and added some water and shook it!). sprayed multiple light layers to get the saturation I needed taking care to let each layer dry before the next. 

Next, I cut the front of the shirt and made a tiny hole in each large shape. This makes the cutting out easier later. I then basted it to the red backing layer at the arms and neck.

Stenciled top layer basted to the back
  
Shape with hole to aid in cutting later.

I prefer to join my layers while it is in an embroidery hoop. Using button and craft thread, I sew a running stitch around each shape. I tie a double knot to secure it after each shape. Using the hole I previously cut as an entry, I removed the middles leaving about 1/4 of the silver paint.


Here is the completed shirt.

I sewed the internal seams on my machine and hand-sewed the external seams laying them down toward the back. I really like the curved hem on this.


I bound the neckline with a bias strip and secured it with a herringbone stitch. I am still working on getting it to slant less.


I really do enjoy the puff sleeve on this.


I am very happy with this result. The bold red is very striking when paired with the silver paint and black fabric. This stencil size is large and relatively fast to sew. 
This look can be created using a tried and true t-shirt pattern. Use a dinner plate to cut the curve of the hem and end your stitching about 8-inches up.

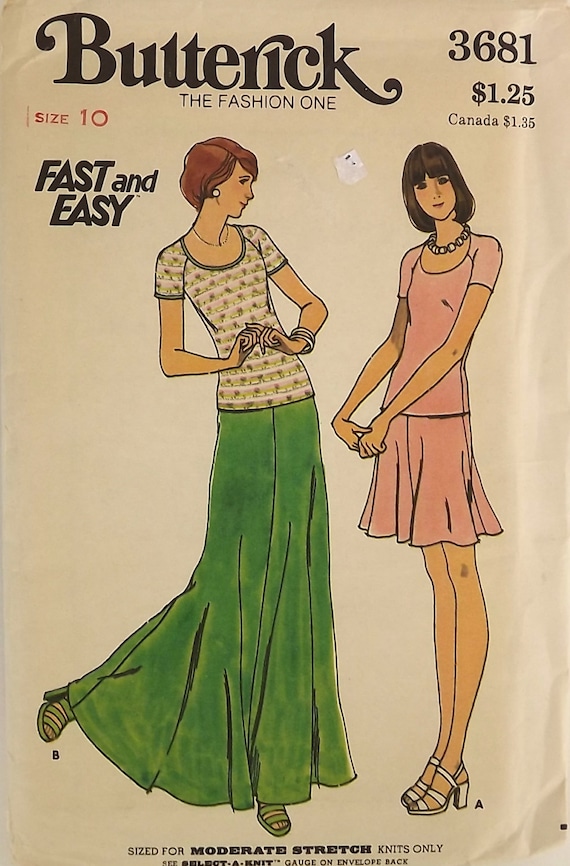
I enjoyed this stencil so much, I made another in the applique technique using vintage Butterick 3681 to make view A. Mccalls 7093  is a currently available close pattern match.


     Vintage 70's Sewing Pattern, Top and Skirt, Size 10

The beginning of the process is the same without cutting a hole in the shape before sewing the layers together. For the applique, I cut around the shapes outside the gold paint by about a 1/4 inch. All the outside fabric is removed.


The internal seams of the top and skirt were machine sewn. The visible seams are laid down and hand-sewn. The neck binding was secured using the herringbone stitch.


I like the depth of the neckline, raglan sleeve with a shoulder dart. The sleeve and bottom hems are left raw; they will curl when washed. Speaking of washing, I machine wash on delicate inside out. The quality of the stitching and paint have not been compromised  in my many hand-sewn garments. 


The texture in this effect is so fun, isn't it? 

If you want to make these tops, or some other garment you can! You can download the pdf image of this stencil for free in My Craftsy Store the link is in the right column. It is a 6-page landscape layout that you can download, piece together and make.  If you use it, please share your projects with me!

Happy Sewing,
Bianca