Sunday, July 31, 2022

Bring the Drama With The Toni Designer Dress by Style Arc


Drama, Drama! Drama! My life of late, has been filled with drama. Most recently, I have been recovering from my 4th knee surgery to repair a failure of the 3rd procedure. Right when I was regaining my mobility and sanity, despite succeeding in avoiding Covid-19 for 2 years, our family got it. The timing could not have been worse as it meant spending the week of our 20th anniversary shivering in bed, in the not fun way.  We are all on the mend now and I am able to get back to my sewing room.

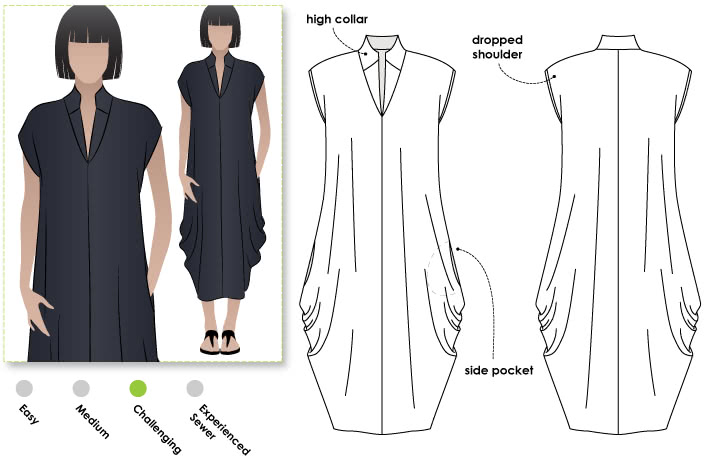
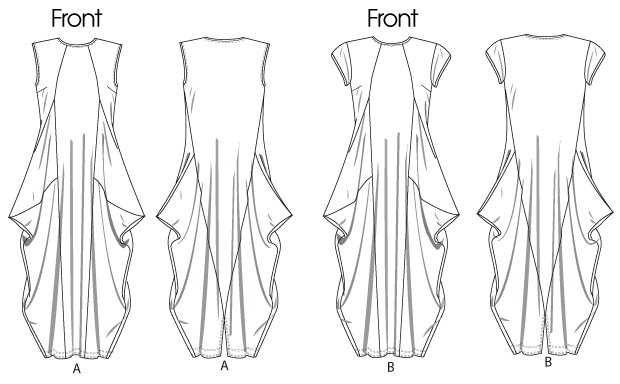
You know I love a garment with a bit of interest and drama. If you have been hanging with me for awhile, you also know I default to vintage and retro patterns. The styles are fun, patterns are sometimes cut, and can be bought at a steal.  It takes a something special for me to switch it up to a different company.  I recently stumbled upon the Toni Designer Dress by Style Arc. I love the details of the high collar, side drapes, and the side pockets. 

Toni Designer Dress Sewing Pattern By Style Arc - Fabulous long line designer dress
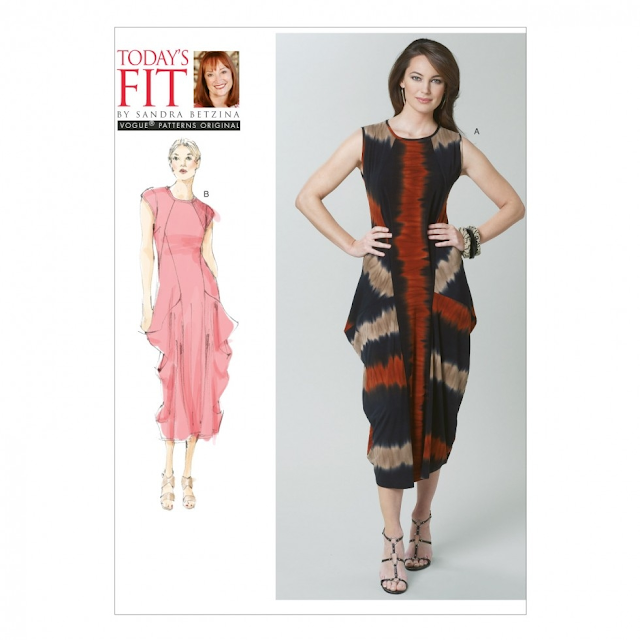
This pattern has been out for a minute so I searched other examples for inspiration. I liked the structure of those made with woven fabrics. For my first version, I chose, this Lake Heather Hemp Chambray from Nature's Fabric. It is a hemp, recycled polyester and spandex blend.  
This is my first time sewing a Style Arc pattern. This dress is classified as "Challenging" largely because of the collar construction. I however, found the cutting lines to be a bit tricky. I followed the colored line for my size, but there were other markings on the body of the dress that were not clear to me. Granted, my leg pain and Covid-19 fatigue contributed to my perceptions of the difficulty. 

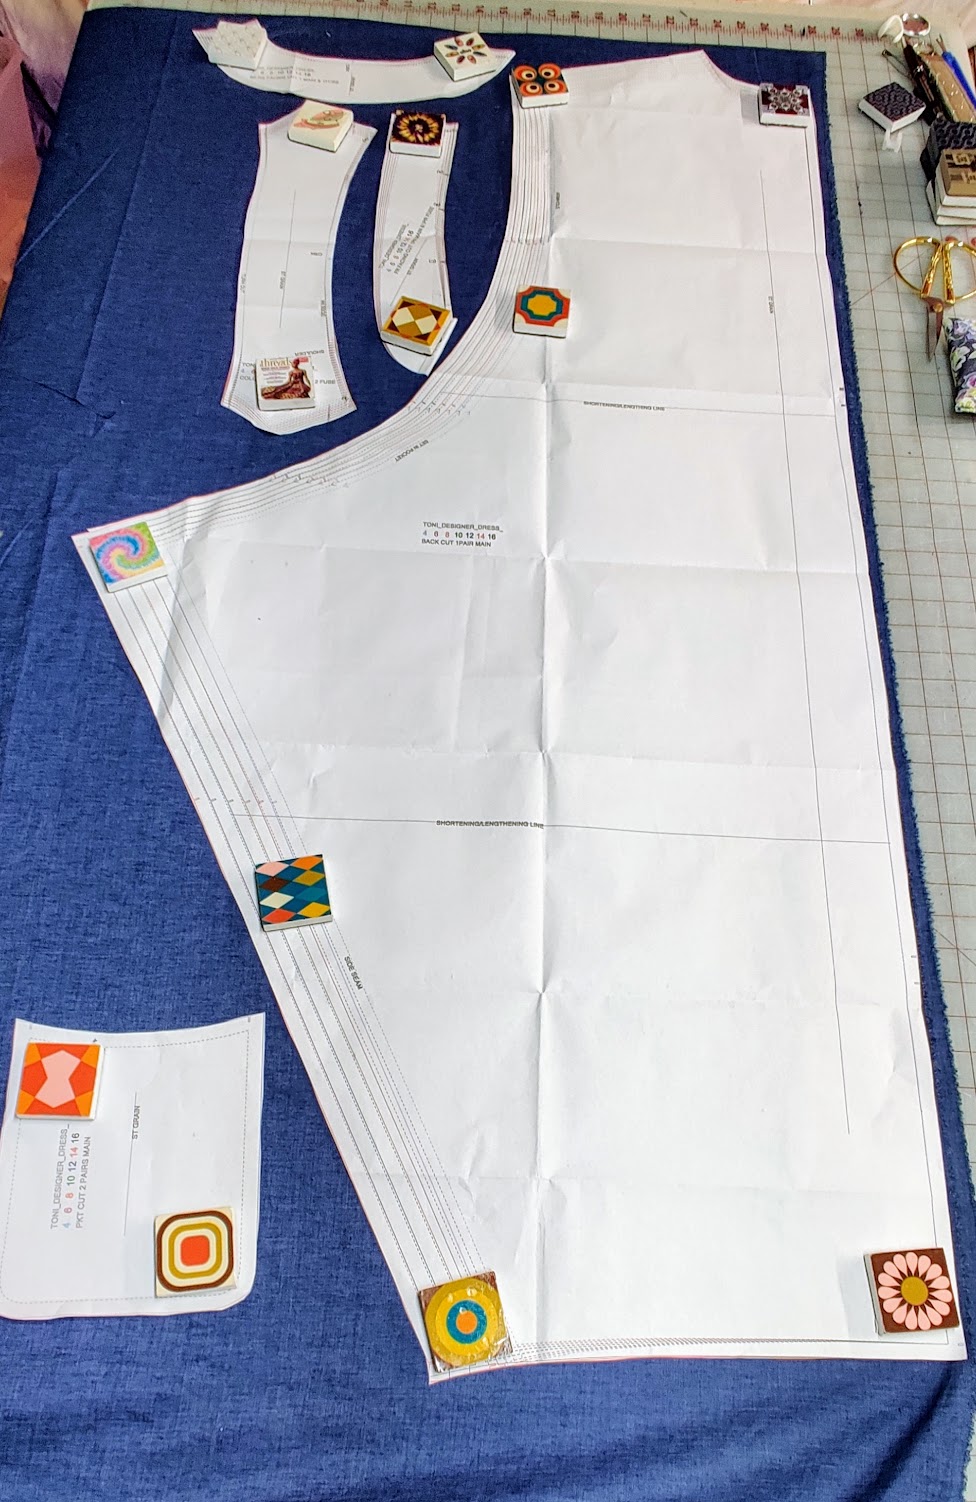
Mid Century Pattern Weights available in my store

In the end, I did not stress my confusion, I decided to roll with it and hoped it would come together. 


The collar instructions were clear with photos, but the rest of the instructions could have benefitted with some more. I am a visual learner, so showing me what should happen is helpful. The use of "facing" for interfacing and "facing" for right side of the fabric was confusing for a moment. In the end, it all worked out and I am happy with the finished dress.


The collar can be flipped down,


or worn turned up. 


The sizing is generous and there is a lot of ease. I cut it based on my bust, but should have sized down by one size for a woven or two for a knit. I ended up removing about six inches all around.


The pattern suggested adding weights to the inside point side seams to help the draping. I chose not to and just let the fabric do what it will.


There were a few hiccups in making this dress, but it was worth it. I am glad I tried this new to me pattern company. This feels like a cool art teacher dress and I love it!

 
Happy sewing,
Bianca

Thursday, June 2, 2022

The Introvert Dress


In college, someone in my circle who I knew for a few months shared an assessment of me. They described me as "hard to meet, but easy to know". They explained that it took a while to connect with me, but once one did, our relationship was easy. As an introvert this made perfect sense to me and I appreciated the simple way they summarized it.

As I was working on my latest project for Nature's Fabrics, I was reminded of that description. I used Vogue 9237 to make what I'm calling my introvert dress.


From the front you get a very sedate and neutral look, but the back is an opportunity for bold visual interest.


For Me Made May, I have been playing with adding quilty elements to my garments. (I did not blog all of them but you can take a peek at them here on Instagram). I love this pattern because it has the option of the contrast panel back. I thought this would be a perfect canvas to add some interest to this wonderful tan linen from Nature's Fabrics.


For the contrast, I used a jelly roll quilt pack that I purchased from Austin Creative reuse. It's a Moda fabric collection from a few years ago.


I stitched the long ends together and then drew horizontal vertical and diagonal lines along the wrong side of the fabric. I stitched a quarter inch along both sides of the line and then cut the marked line open. This gave me rectangles stitched together on an angle. It's the same concept as the Magic 8 half square triangles. Because this is not a square my output is a little different.


I pressed those seams open and then pieced them randomly together to form my base fabric. From that, I cut my two back pieces. The rest of the construction came together quickly and easily per the pattern instructions.


I love the unassuming look of the front of this dress.


The bold color in the back is a fun reward for giving this one a chance.


I made the size medium in the sleeved version. I began by making the sleeveless version, but I did not like it once I did. The sleeves are faced with bias tape and I felt they extended past my shoulder in an awkward way. If the dress did not have the patchwork, I would have simply trimmed the armscye to fit. As it is, I did not want to cut through the multiple seams of the piecing. I instead opted to add sleeves.


The hem on this dress is slightly higher in the front than the back. A friend made this and mentioned that fact. Until I remembered it, I thought either it was poorly drafted or I did something wrong.

I love a lightweight linen dress to help contend with the heat of the Summer. I love the cantaloupe color Nature's Fabrics offers, so I may revisit this pattern.


I will be taking a machine sewing break for a bit. I will be down for yet another knee surgery. I will not know how long recuperation I will take until the procedure is done.

I will be using the down time to continue to prepare for my Represent! Embroidery book release on September 25. I appreciate any prayers, good vibes and positive thoughts you care to send my way. Thanks!

Happy sewing,
Bianca 

Tuesday, May 3, 2022

Me Made May 2022


It's Me Made May time! This challenge is designed to encourage people to make their own clothes and improve their relationship with their handmade wardrobe. You can read about the origins and goals of the challenge here. I wear my me-made clothing frequently and I use this challenge to focus my making. This year while brainstorming with my friend Hillary, we came up with a fun theme for us to play with. We like to challenge each other to up our creative games and this year we are combining quilty goodness into our garment making. 

The intention of Me Made May is not specifically about making new things, but in part about sustainability and reuse. Given the size of my pattern and fabric stashes, using what I have is a focus of the challenge for me.

My goals are to:
1. Integrate pieced, patchwork, quilted elements into what I make.
2. Use from my stash of pre-made, gifted and thrifted base materials. 
3. Use patterns from my out of print, retro and vintage pattern stash.
4. Add more separates.
5. Wear my me made clothes daily.

Most of my time lately has been spent stitching up some of the 100 designs from my upcoming book Represent! Embroidery. What I am able to sew on my machine will largely be dictated by hand fatigue and the need for necessary breaks. 

The first project I want to share with you is this upcycled hexagon quilt top tunic.


A couple of years ago I was given a handmade hexagon quilt top from a friend. When she gave it to me she warned me that it was made using a mixture of polyester and cotton hexagons. She saw the mix was inconsistent and she could not see it selling in her store. She gave it to me and hoped I could use it. 


The quilt top was completely hand-stitched and I appreciated that. In spite of the double-knit polyester bit, it had a funky, scrappy charm. I value the time and effort it took to sew these hundreds of hexagons together.


I am lucky enough to own a few Betsey Johnson sewing patterns and chose this vintage Butterick 4680 pattern.
Due to the age of the quilt top, I inspected it and found there was some damage the needed to be repaired before cutting. 


I used my rotary cutter, mat and pattern weights to cut the fabric pieces. Cutting broke the delicate hand stitches and I feared using scissors would cause me to manipulate the fabric more than I wanted.


There was some inevitable unraveling at the cut hexie seams. I immediately took the cut fabric to my serger to secure those edges. I would not venture into a project like this unless I had the time to cut and serge in one continuous session. Those cut edges are very fragile and I did not want to take any chances.


Once the precarious part was done I sewed the fabric up as I normally would.​ ​This top is unlined. The fabric is very lightweight and airy and I did not want to lose that feel. There is generous ease so the top barely touches my body and where it does, it's not uncomfortable.


I used a cotton cord as the neck tie.


I love the funky vibe of my new tunic.


There is plenty of discussion about repurposing quilts to satisfy the quilted garment trend. I believe in pulling things down from shelves and out of tucked away places. I love to breathe new life into what would have been discarded or ignored. My goal is to celebrate the workmanship of the original piece by making something I will use and love. 

Happy Sewing,
Bianca

Thursday, April 21, 2022

My New Book Represent! Embroidery

I am really excited to announce the news of my first book on embroidery due out in September. 

I am so proud of the projects, stories, and designs to stitch. I hope you will love and embrace it!

-Big thanks to C & T Publishing for bringing my dream to life.

From the publisher:
Bianca Springer brings you 10 projects and more than 100 designs in her upcoming book, Represent! Embroidery, to be released on September 25, 2022.

Finally, an embroidery book for everyone! The fun motifs feature people in a full range of skin tones, hair textures and shapes. The designs are culturally relevant and tells a part of our shared stories. A robust collection of finished projects that readers of all colors can stitch up to reflect themselves and loved ones without painstaking alteration to the motifs.

"Toni Morrison once said, 'If there’s a book that you want to read, but it hasn’t been written yet, then you must write it.' These are the designs we want to stitch. These are the stories we want to tell. I hope makers will discuss, embrace, and celebrate this book with me." - Bianca Springer
PRE-ORDER Represent! Embroidery: https://www.ctpub.com/represent-embroidery/


Happy Sewing,
Bianca 

Tuesday, February 1, 2022

The Good Night's Sleep Dress Vogue 1234


Oh, don't you just love an interesting pattern? I have had Vogue 1234 in my pattern stash for quite a while. 
The global pandemic and the struggle to make useful, wearable pieces with limited places to wear them are in constant conflict for me. When I think about what to make lately, I am getting bored with the idea of making basics. I was looking for a challenge and this pattern is a good palate cleanser and a return to weird and wonderful making. How can you not love the angles and all the funky seamlines of this dress. 


Once the decision was made, I spent a lot of time contemplating fabric choices and placement options. I have seen this dress made up on pattern review in solids, prints, and inspiring color-blocked options. For my first foray into this pattern, I chose to do a print and solid mix. I shopped Nature's Fabrics for two coordinating fabrics. I went with tan distressed dots for the print and black bamboo spandex jersey for the solid. I chose to highlight the print on the center front and back, the sleeves and the neckline.

I made size C based on my bust measurement. This pattern makes no accommodation for lengthening or shortening so I cut it as is. After cutting the pattern and the fabric out, I had planned to begin construction immediately. 

The pattern instructions are different from those of typical patterns. Due to the fabric shapes and construction details additional work is needed to mark the pattern so the pieces fit together correctly. It was a little frustrating for me to take the extra step of numbering the pieces as the designer wanted. Why didn't the pattern company preprint the numbers in advance? After adding the markings and reading the instructions, I knew I could not undertake making this late in the day as I had planned. With illustrations like this, I knew it needed a good night's sleep, a clear head and a full cup of coffee.

With a clear head and determined focus, I dove in. In the end, it was not as difficult as it initially appeared. It came together in an afternoon. The additional markings made all the difference, don't skip this step. 

The only thing that was a bit time consuming was the recommendation to wait until the garment was significantly constructed before using your serger to edge finish the seams. With typical knit garments, I usually do those steps simultaneously. This was a wise recommendation so you have fewer threads to unpick if you mismatch the placement. I made this mistake and unpicking a zigzag stretch stitch is no joke! I could not imagine having to unpick a serger seam.

I made no modifications to the pattern. The only change  was I used my cover-stitch machine to finish the hem and neckline.


I love the drapey goodness of this dress! It is so comfy and came out exactly as I hoped. 


The fun continues on the back.

I like this version and hope to make another this summer with color-blocking and decorative hand-stitching.


Many people commented about this pattern on my Instagram post. Many have it, but have hesitated to make it because of the intimidating looking instructions. I am here to say, it's different, not difficult; do it!


Happy sewing,
Bianca