Showing posts with label paisley stencil. Show all posts

Thursday, January 9, 2014

Alabama Chanin Long Paisley Dress WIP

Now that I have completed my Anna's Garden Short Dress I am ready to move onto another Alabama Chanin project. Next up on my list is this long paisley dress from Alabama Studio Sewing and Design. I fell in love with it the first time I saw it, but at $2800 it is out of my reach. I knew I had to make it when I had an occasion to wear it. I have two weddings this year, one in March and one in July. I hope to have this one done for March.

Alabama Chanin Maxi
This will be a daunting task as this is a fully embellished dress. I am hopeful that  because it is a large format stencil it will go quickly. I made my paisley stencil in a process I explain here. For this project, I made it with three sheets of pennant felt because I wanted the airbrush process to go faster.

Stencil ready for airbrushing

Dress laid out

My trigger airbrush.
I recently upgraded my airbrush to this trigger model.  I love this mechanism with the lower pull trigger. My former top pull model made my finger cramp when I sprayed for too long. I find I spray faster and smoother with this new one.

 
Covering the already stenciled parts.
In the photo above, you can see that I used the mail box and felt sheet to cover the already airbrushed portion of the dress. By covering the previously stenciled area I can get really close to the painted areas without large gaps. The top layer is a tan jersey and the lower layer is also a similar tan with a bit more white in it.

One of four panels 


The stitching has begun.
So, I am chugging along and will keep you posted on how it goes.

Happy Sewing!

Monday, October 28, 2013

From a Four Panel Swing Skirt to Paisley Corset

My very first embellished Alabama Chanin project was started three years ago and was overly ambitious. I decided to make the four panel swing skirt from the Alabama Stitch Book. My plan was to use a reverse back-stitch with embroidery floss to sew a negative reverse applique. I decided to use the Paisley stencil because it is a large scale design and I thought I would finish quickly.
I used a spray bottle and red fabric paint to transfer the designs to my fabric. I can't remember now which paint, but it was too thick and sat on top of the fabric making it a bit hard. At the time I was too new to this whole thing to know it was a poor paint choice. I used six strands of embroidery floss for my reverse back stitches (it should have been done with four). The density of my floss coupled with the double layer of fabric made it slow going. In addition, the tension of the fabric and thickness of the thread did not make a smooth process. Over the course of a few months I got two and a half panels of the skirts stitched.

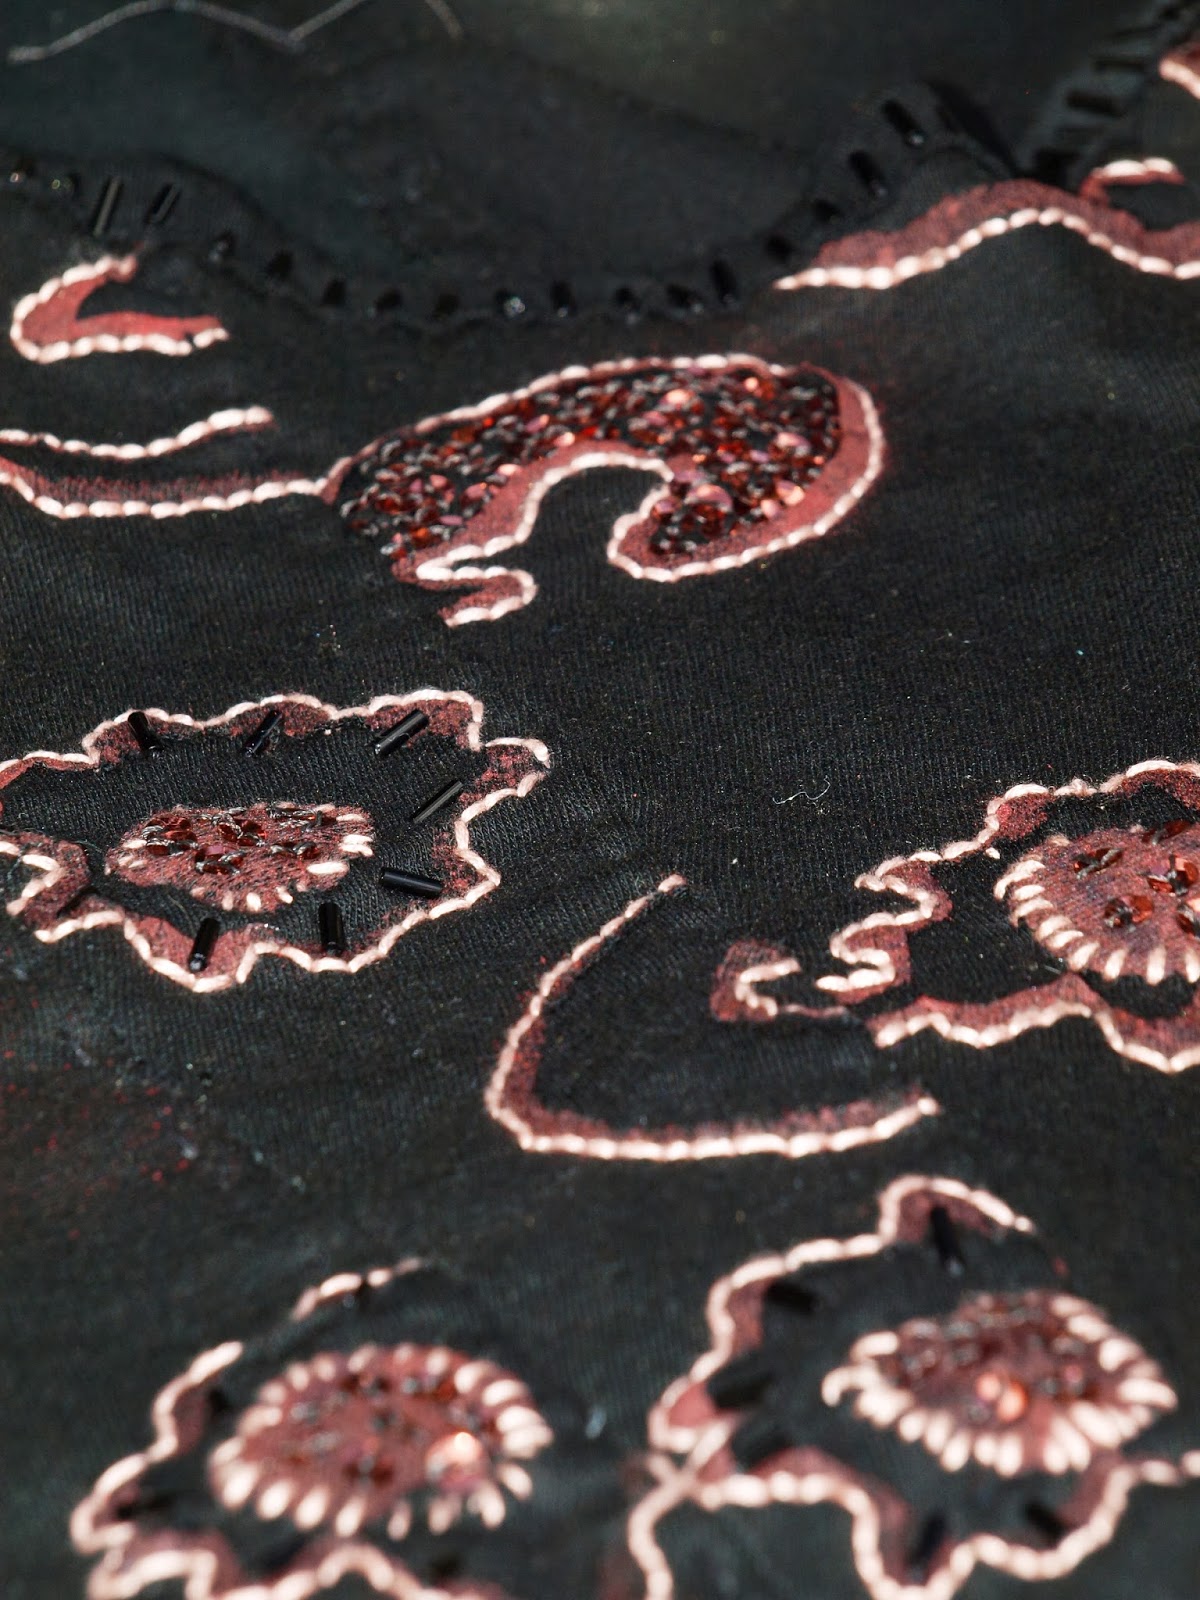
As time went on, I realized that this was not a project I wanted to complete. I put it in my unfinished projects pile where is mocked me for almost 3 years.  After redeeming my polka dot caplet I got inspired to breathe new life into this project. Rather than continue with it as a skirt, I decided to transform it into another corset. Fortunately, I had enough of the panels finished to make it! I choose to  embellish the front only using black bugle beads and copper colored sequins to embellish specific features of the paisley design.

Adding sequins with my handy dandy beading glove made from the sleeve of a sweater and double sided tape.

Sequins and Bugle beads along the neckline.


I followed the instructions outlined in the book and stitched the corset in a double layer of cotton jersey.
For this version, I did not raise the depth of the neckline like I did last time. The parallel stitches with beads along the neckline  keeps it from shifting too low. When I make the corset again, and I will, I will  cut it higher as before.


I am very satisfied with the re-purposing of my unfinished skirt into this corset! I am even happier to have one less item in my work in progress pile.


Happy Sewing!
Bianca

Thursday, July 4, 2013

Paisley Border Alabama Chanin Tank Dress with Matching Long Sleeve Bolero

 The other day I was going through my closet looking for something to wear to a silent auction. I don't usually have "Nothing to Wear" days. I have "Oh, I forgot I made that!" days. It happened again! I rediscovered one of the first garments I made once I got hooked on Alabama Chanin hand- sewing. I did not review it or the matching bolero jacket I made to go with it, so here we are.


It is a short length tank dress with a applique border along the lower half of the skirt. For this single layer dress, I used tan jersey fabric as the base and a plum colored jersey fabric for the top layer. It is hand stitched with natural colored button and craft thread.  I did not have an airbrush at the time, and used a spray bottle to apply white paint with the paisley stencil. I used this stencil because I liked it, but also because the large scale stencil could be sewn up quickly.

I can admit now, that my workmanship was not the greatest. I was eager to get it done and did not take as much care as I could have. My stitches were wider than they should be on the applique. The herringbone stitches on the binding on the bolero are stretched too far apart. Those "flaws" did not stop me from wearing this outfit! I hand stitched it, I am going to wear it!


This dress is the large size that I made before losing some weight so it is not fitted to my body/ B.I.R.A dress form as the small/medium I would cut now, should be. I like the extra ease in this dress now that I am smaller. I could see myself making this in the large again if only the lower portion is embellished, but not the complete dress. The single layer of jersey is thinner, so having it not cling works for me. The double layer of a full dress feels better with a closer fit.

On this dress, I did not adjust the low neckline as I didn't get Laura's tip on raising the straps until recently. This low neckline made it necessary for me to cover up with the bolero. I made it with a single layer of jersey cotton and appliqued the wrists. I secured the binding with a herringbone stitch. The bolero is a size large and I think it is too big now. The straps from the dress keep it in place, but I think the smaller size in it would be more flattering when worn.


Pattern Description:
Hand-stitched four panel tank dress with long-sleeve bolero from Alabama Chanin Studio Sewing and Design


Pattern Sizing:
 

S,M,L,XL I made a size large in this dress.
 
Did it look like the photo/drawing on the pattern envelope once you were done sewing with it?
 

This specific dress design is a not featured in the book, but the elements I used are. This is the Short Tank dress that I embellished with the paisley stencil that can be made from the book. The bolero is the long sleeve version that I appliqued the wrists with the paisley stencil.

Were the instructions easy to follow?
 

The books give very clear instructions and inspirations for creating multiple garments. The garment construction is not difficult, but it is time-consuming. (Does time-consuming have a negative implication? It is engrossing, time-dependent, addicting, and repetitive.) The garments in the book require a great deal of work and the results appear complex because of the details, but broken down into smaller parts, easy.  
What did you particularly like or dislike about the pattern?     

I love everything about the patterns in this book. The paisley stencil is large so it stitches up faster than some others in the book. With this stencil, you feel like you are making progress especially if you are working with a running stitch. 

I don't like the depth of the neckline in the front and back. They are too low for my style. By raising the shoulder straps by about 2 inches on each side, I get the modesty I require. (I did not shorten the straps on this dress.)  
Fabric Used:
 

Jersey Cotton in Tan and Plum.

Pattern Alterations or any design changes you made:
 
I made the tank dress in the short length with not alterations to the pattern.


Would you sew it again? Would you recommend it to others?  

Yes and yes. I plan to make another with an all-over paisley design in hunter green.

Conclusion: Great books and start to an awesome addiction. 

Information regarding my custom dress form and PDF giveaway can be found here

Happy Sewing!

Wednesday, May 8, 2013

Alabam Chanin Paisley Tee and Maxi Skirt

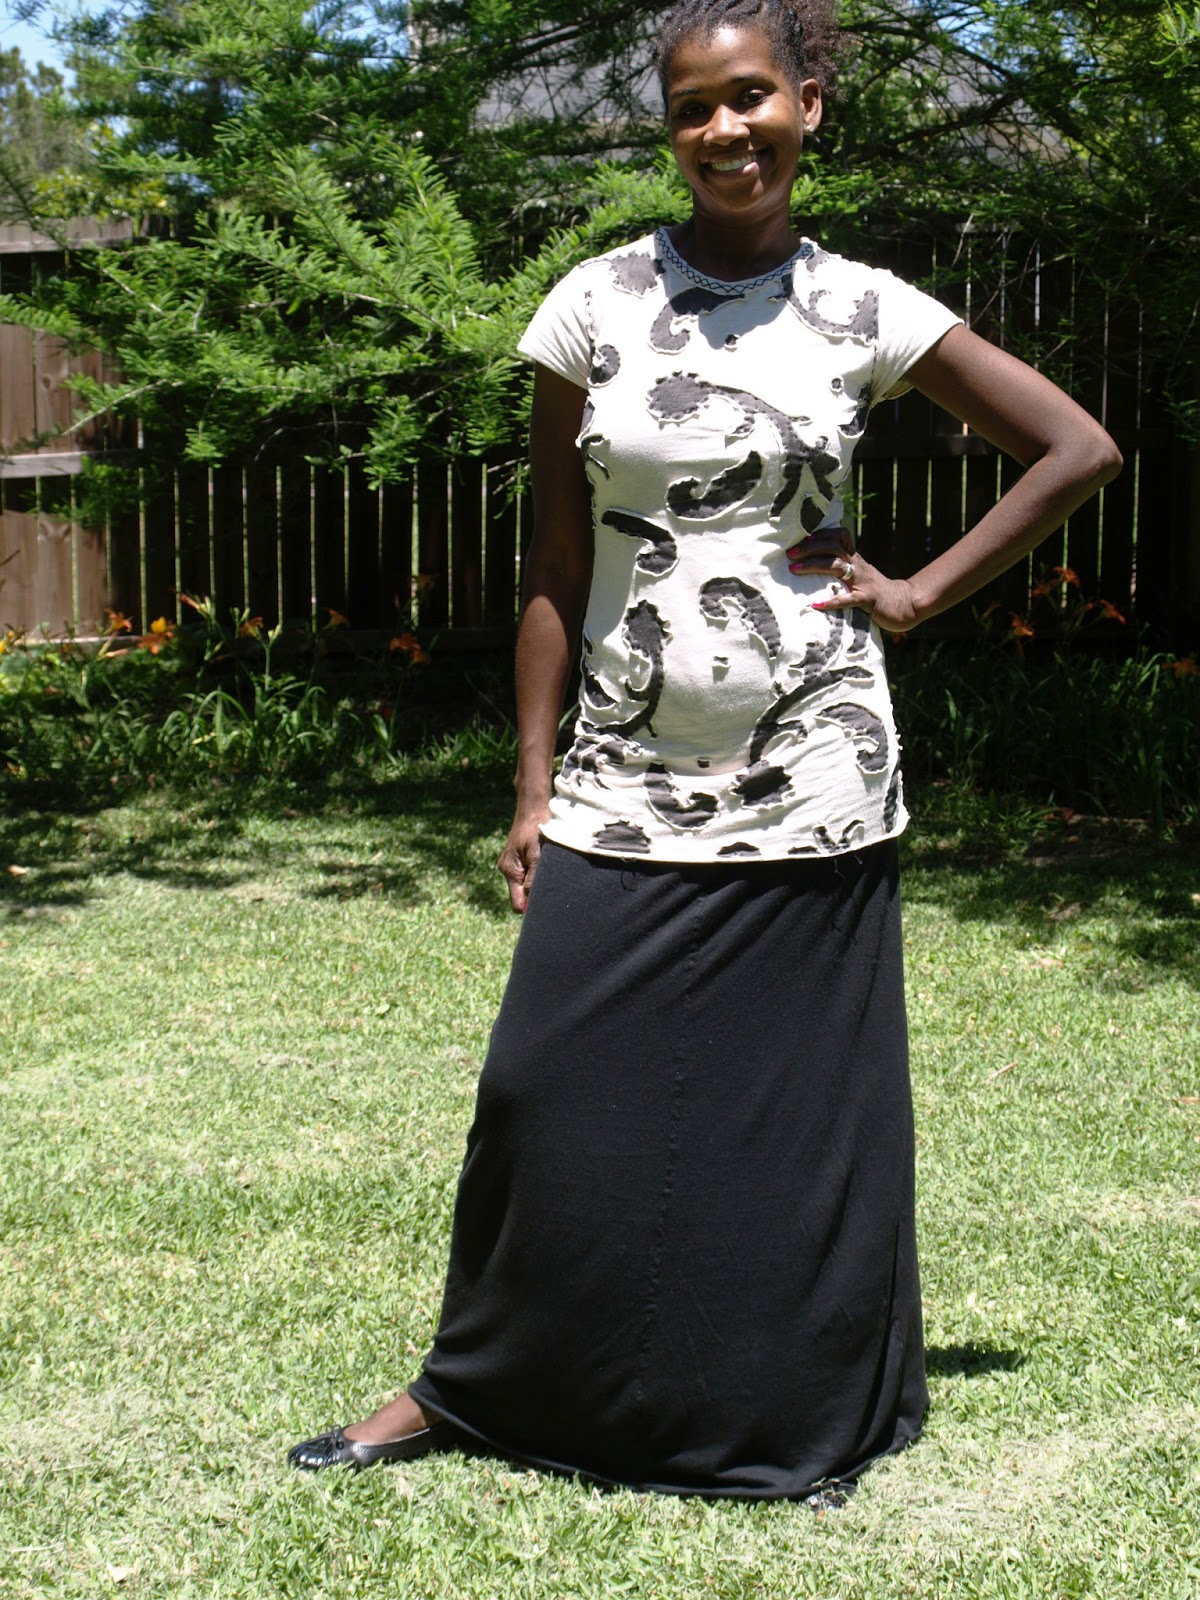
I am at it again! I so loved my Angie's Fall tee that I made another tee using the Paisley stencil this time. I constructed it in tan jersey painted with black paint. The front is constructed with a double layer using the applique technique. I used a cross stitch to bind the neckline using black button and craft thread.


Neckline and Stitch Details

I love how the edges curl up.

For this shirt, as with the other, I cut the size medium and sewed a 5/8th seam allowance into the shirt when I constructed it. So the sizing is midway between the small and medium sizes. I found that to be the perfect sizing for me; not too tight, not too loose. I cut the front and back pieces about six inches longer than the pattern suggested. I knew I would wear it with a maxi skirt, so wanted a tunic length.

I love this shirt! It was fairly fast to put together and only took 2 weeks of evening and free time sewing. Using a running stitch rather than a reverse back stitch makes such a difference in terms of speed. It is so rewarding to complete a garment from beginning to end in this way. Tracing the pattern, cutting, painting, embellishing, and sewing it all by hand is well worth the effort.


The maxi skirt was made using vintage Butterick 6170 that I found at a resale store for $.10. I used black jersey fabric that was a gift from my grandmother-in-law. I made the skirt pictured in view A. I decided not to use the pattern from the Chanin books for the skirt because frankly, this was the path of least resistance. It was already cut and had an even hem. The A.C. skirt pattern that was traced and cut has the slight train and I didn't want that look here.  


I hand-sewed it in the A.C. style using button and craft thread. I changed the pattern in a couple of ways. I omitted the zipper, facings, and darts. I also added a front and back seam in the middle of each cut skirt panels. The cut pattern is a size 12, so by adding the two seams and a 5/8 seam allowance I took it down to about a 10ish. I bound the waist band using 5/8 inch fold over elastic and stitched using a parallel stitch. I did not hem it, but allowed it to roll on itself. I am 5 foot 8 inches tall and found this length perfect for me.


Seam Detail


I will likely be making this again in different colors. I am sure I will be making more shirts, so the skirts will naturally follow.

 Happy Sewing

Sunday, February 10, 2013

My first authentic Alabama Chanin Stencil!

Happy dance, happy dance! I have a finally purchased a stencil from Alabama Chanin. I have made all of my stencils to this point using pennant felt and the techniques outlined in her books. I have made Angie's Fall, Paisley, Little Flowers, Medium Circles and Bloomers (though I will remake it as I am not pleaded with the way it looks). These stencils have served me well and are very durable, but small. The shapes in the designs are reasonably sized, so I did not mind the tedious cutting task.
Pennant felt stencils
I decided I wanted the Anna's Garden stencil and did not want to cut out all those pieces out. So with a bonus I got from work (hehehe), I ordered one.

From the Factory!

Even the packaging it stenciled.

Happy Sigh
I am so glad I bought this! It is four times larger than any  of my felt stencils and will make my painting go so much faster! I can't wait!

Happy Sewing!

Thursday, January 24, 2013

Utterly, Completely, Totally Obsessed beyond all reason with Alabam Chanin sewing.

A year ago my mother-in-law gave me the book Alabama Studio Sewing and Design. I added it to my amazon wishlist because it was a sewing book and I liked what I saw in the preview. I really had no idea how much I would love the process of slow-stitching  and completely constructing garments by hand from start to finish. Natalie Chanin's design concept uses 100% organic cotton and all hand-stitched and richly embroidered with applique, reverse applique, intricate bead work, ribbon embroidery and various knot techniques. Her designs are available for purchase as customizable garments on her website Alabama Chanin. The garments are made to order and to your specifications. The garments are expensive and at first glance may seem outlandish. If you consider what goes into each piece, you will see why they are worth so much.

If paying $300 for a skirt or $3400 for a dress is too much for you, how about you make your own! She does the fabulously unthinkable thing of giving her fans all the tools to build their Alabama Chanin wardrobe at a fraction of the cost  in her three books. She provides the patterns, the stencil artwork for download, the sewing techniques and inspiration for you to begin the slow and satisfying process.
Alabama Chanin sewing books


I have since purchased the other books and dived in. I have traced patterns, cut stencils, painted fabric, and sewn and sewn and sewn. Here is a sampling of what I have made using her techniques.

With all the details required for her garments, I thought I would start my projects small and began making the uber cute bolero from her third book. I used the spiral applique technique and the herringbone stitch. It was so satisfying to make this and I worn it a great deal last summer.


Spiral Bolero front


Spiral Bolero Back


 After constructing the bolero, a few skirts, and a couple of failed projects, I decided to tackle a dress or two. I thrifted some lovely tan jersey fabric from the local Value Village and used some plum jersey from my stash. I used the paisley stencil and tank dress pattern from Alabama Studio Sewing and Design. I made this dress in a single layer and am happy with it because of the Texas heat, but I think I prefer the heft of a double layer garment.
I
Alabama Chanin Paisley Tank Dress


Detail of the skirt

Detail of the herringbone stitch on the neck and arm bindings.
This dress took a month to make and I relished the slow progress as I went along, but boy was I glad I didn't decide on an all over design. I wanted it to be done so I could wear it! I am very happy with the end result and am so ready to move onto the next project.