Showing posts with label felled seams. Show all posts

Wednesday, May 29, 2013

Alabama Chanin Short Fitted Tank Dress with Random Ruffles


I am slowly and steadily stitching away at my Anna's Garden fitted tank dress that I airbrushed months ago. It has four panels that need to be extensively stitched. I work on it every now and then, but then I get impatient; I want it done now! More specifically, I want more Alabama Chanin pieces in my wardrobe. To that end, I step away from it to and work on a faster project
This time it is the Short Fitted Tank Dress from the book Alabama Chanin Studio Sewing and Design. I decided to make it using random ruffles for embellishment on the front. I chose to add a neck ruffle and a strip of contrast to the neckline. I found that pinning the random ruffles onto the dress front easier, than ruffling it as I went along. I got a few more pin pricks that way, but it went a lot faster.


I felt the neckline was too low for my liking so I added the gathered  ruffle to give more coverage. It did the trick in the front, but I think it made the back too heavy and it doesn't lay as flat as I like. I folded the ruffle in half before stitching it in place. Next time I will use a single layer for the ruffle. Not a wearing deal-breaker, but good to know for next time.

Here are is the finished garment as well a review of the pattern.


Be careful in marking the center front and side seams on this one! I am pretty certain I didn’t do this and sewed them wrong. Look! I think the side seams should be center and the center seams on the side! Grrr! I am glad at least that I made this mistake on this dress rather than another, with more embellishments. Lesson learned. I plan to resolve this issue by paying attention next time and wearing this one with a bolero I plan to make. Regardless, I like the dress and will wear it happily!

The problem seems obvious now!


Pattern Description:
Four panel tank dress from Alabama Chanin Studio Sewing and Design

 
Pattern Sizing:
 

S,M,L,XL I made a medium and sewed it with a 1/2 inch allowance.
 
Did it look like the photo/drawing on the pattern envelope once you were done sewing with it?
 

This dress is a combination of multiple elements from the book brought together in one piece. It looks like I intended.

Were the instructions easy to follow?
 

The books give very clear instructions and inspirations for creating multiple garments.
 
What did you particularly like or dislike about the pattern?     

I love everything about the patterns in this book. I do not like the depth of the neckline on the dress however. This dress is muslin to test increasing the modesty level with the added ruffle.
Fabric Used:
 

Jersey Cotton in Tan and Brown

Pattern Alterations or any design changes you made:
 
I made the fitted tank dress in the short length. I added four strips of brown random ruffles on either side of the center seam. I added a brown gathered ruffle to the front and back neckline. On top of the ruffle I added a 1.5 inch strip of tan jersey that I secured with a herringbone stitch. I bound the armholes with strips of jersey using a parallel stitch.

Would you sew it again? Would you recommend it to others?  

Yes and Yes!

Conclusion: Great books and start to an awesome addiction. 

Happy Sewing!

Wednesday, May 8, 2013

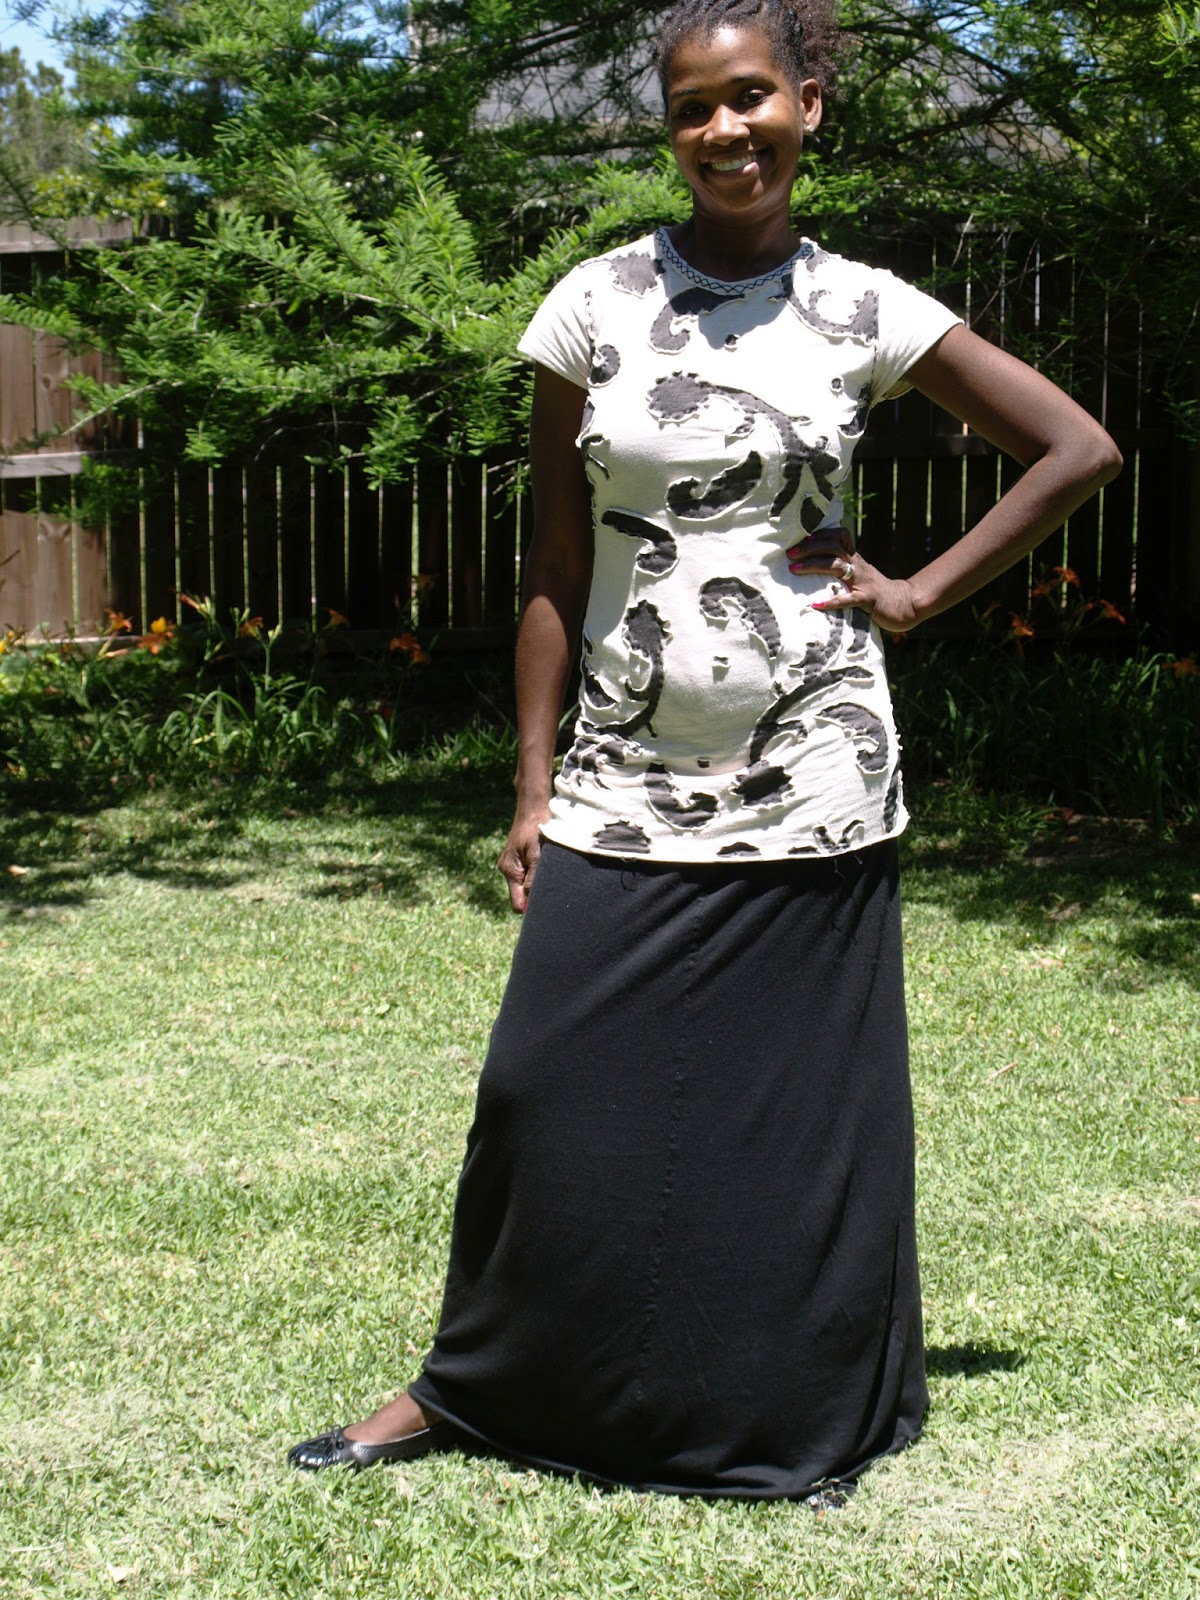
Alabam Chanin Paisley Tee and Maxi Skirt

I am at it again! I so loved my Angie's Fall tee that I made another tee using the Paisley stencil this time. I constructed it in tan jersey painted with black paint. The front is constructed with a double layer using the applique technique. I used a cross stitch to bind the neckline using black button and craft thread.


Neckline and Stitch Details

I love how the edges curl up.

For this shirt, as with the other, I cut the size medium and sewed a 5/8th seam allowance into the shirt when I constructed it. So the sizing is midway between the small and medium sizes. I found that to be the perfect sizing for me; not too tight, not too loose. I cut the front and back pieces about six inches longer than the pattern suggested. I knew I would wear it with a maxi skirt, so wanted a tunic length.

I love this shirt! It was fairly fast to put together and only took 2 weeks of evening and free time sewing. Using a running stitch rather than a reverse back stitch makes such a difference in terms of speed. It is so rewarding to complete a garment from beginning to end in this way. Tracing the pattern, cutting, painting, embellishing, and sewing it all by hand is well worth the effort.


The maxi skirt was made using vintage Butterick 6170 that I found at a resale store for $.10. I used black jersey fabric that was a gift from my grandmother-in-law. I made the skirt pictured in view A. I decided not to use the pattern from the Chanin books for the skirt because frankly, this was the path of least resistance. It was already cut and had an even hem. The A.C. skirt pattern that was traced and cut has the slight train and I didn't want that look here.  


I hand-sewed it in the A.C. style using button and craft thread. I changed the pattern in a couple of ways. I omitted the zipper, facings, and darts. I also added a front and back seam in the middle of each cut skirt panels. The cut pattern is a size 12, so by adding the two seams and a 5/8 seam allowance I took it down to about a 10ish. I bound the waist band using 5/8 inch fold over elastic and stitched using a parallel stitch. I did not hem it, but allowed it to roll on itself. I am 5 foot 8 inches tall and found this length perfect for me.


Seam Detail


I will likely be making this again in different colors. I am sure I will be making more shirts, so the skirts will naturally follow.

 Happy Sewing

Monday, April 29, 2013

Alabama Chanin Fitted Tank Dress

One of the first items from the book the book Alabama Chanin Studio Sewing and Design that I fell in love with is this paisley dress. I have been hesitant to make it because of all of the hand sewing involved. Rather than make the fully detailed dress I decided to make an un-embellished muslin.


The pattern came from the third book. For this dress, I cut the size medium and sewed a 5/8th seam allowance into the dress when I constructed it. So the sizing is midway between the small and medium sizes. I found that to be the perfect sizing for me; not too tight, not too loose.

I used tan colored jersey fabric and "natural" color button and craft thread. I sewed it completely by hand using running stitches. I felled the seams to the inside and kept the knots unseen. I bound the neckline and arms using the cross stitch.


stitch details


Cross stitch detail


I love the shape of the dress and the hem that is long in back and slightly shorter in front. I do not like that the neck line is so low. I cut it higher, but had to readjust it after binding it. The higher neckline flopped over. I redid it by re-cutting to the original depth. 

Full length Fitted Tank dress

Long hem/ train in back


I recommend this dress for a thinner person. This dress is not very forgiving on the figure. I added a poncho I made last year. It works well to hide issues a cheeseburger could produce.
Worn with poncho


Pin-tuck poncho back

I will make this dress again. I think I will make it in a dark color in the paisley design. I do not know when I will start it, but my anniversary is coming up. That may be an incentive to get stitching.

I am very pleased that I was able to tick this off of my list.

Happy Sewing

Monday, April 22, 2013

Alabama Chanin Cap Sleeve

I have been at it again! Sewing up another Alabama Chanin creation. This time I have ventured into a new item from the book Alabama Chanin Studio Sewing and Design.


 I decided to make the cap sleeve tee shirt from the book using the Angie's Fall design.


 Before I received my airbrush from my mother-in-law, I painted some grey jersey with my old spray painting method. I prefer the look of the airbrushed painting as it is smoother and looks better. However, since I had it already painted and knew I was going to do a reverse applique technique, I  choose to use what I had on hand.

I used grey jersey for the top layer, black paint, and a baby blue jersey as the backing layer. It is hand sewn using slate colored button/craft thread. I decided to leave the knots exposed on the top and felled the seams to the sides.

Close up of the reverse applique

 Please pardon my wind blown hair! We had to get the pictures while the kids tapped on the window for us to come back inside :).
Alabama Chanin Angie's Fall Cap Sleeve tee shirt.


Detail of the hand sewn seams felled to the back

Detail of the cap sleeve and neck binding with herringbone stitch
For this shirt, I cut the size medium and did not add the suggested seam allowance. I did however sew a 5/8th seam allowance into the shirt when I constructed it.. So the sizing is midway between the small and medium sizes. I found that to be the perfect sizing for me; not too tight, not too loose.

I love this shirt! It was fairly fast to put together and only took 2 weeks of evening and free time sewing. Using a running stitch rather than a reverse back stitch makes such a difference in terms of speed. I like it so much that I airbrushed three more shirts! One will be yellow with the Little Flowers stencil in black; another is tan with black in the Paisley stencil and the last is black with Anna's Garden in white. For those tops, I will make the neck binding wider. The detail of the herringbone stitch is lost on such a narrow binding.

If you haven't tried Alabama Chanin hand sewing yet, consider doing so. It is so rewarding to complete a garment from beginning to end in this way. Tracing the pattern, cutting, painting, embellishing, and sewing it all by hand is well worth the effort.

Happy Sewing