Showing posts with label beaded. Show all posts

Thursday, May 25, 2017

Jeans + Jeans + Skirt = Refashioned Dress

I love a good upcycle project. It is the source of much creativity (and clutter) in my life. I have a hard time getting rid of stuff because I "know I can do something with it someday". The older I get, the more I am facing my mortality and the reality that I will need to live forever to get it all done. I recently released many potential projects to someone with a longer life expectancy than I, but saved a gem or two for myself. Pattern Review is having an Upcycle Contest and it was perfect motivation to knock out one of my refashion plans.


This dress began as its' life as two pairs of jeans and a skirt. I wanted a new creation that hinted to its original form.


The key element of this dress are these beaded jeans that I found at a resale store for $1.75! They are a brand called Sassy Thai a fair trade Thailand based company that employs local artisans. Each garment is custom made to order by one or more specialist in their craft. I cannot imagine the hours that went into making these jeans.  I knew I wouldn't wear them as they were because they are not my style. I bought them and hoped for an inspired project to come to mind that would honor the work done by the original artist.


I scoured my stash and found McCalls 7187. It was a good candidate for upcycling because of the shape of the inset and the option for contrasts. I love that the inset would use most of the bead work showcasing its' beauty. 
 Image result for 7187 mccalls
I chose to make view A because I could use the segments of the pattern with the three "fabrics" I chose. The length of the inset  corresponded with the length of the beaded leg panel of the jeans. I like the version with the gathered skirt as well, but could not imagine that bulk in denim on my hips. 


Image result for 7187 mccalls

Once I decided on the pattern, the trick was to figure out the best way to cut the jeans then,


a game of Tetris with the pattern pieces to make it fit while looking cohesive.


I decided to maintain the original hems from the jeans and skirt. I liked the lace border of the jeans and did not want to disrupt that. I decided to keep the hemline of the skirt so it is consistent with that of the lace in the jeans.


When I cut the inset from the beaded jeans, the edges had some of the side leg seams visible along the edges (see cut panel photo above). Those seams did not look good alongside the even seams from the upcycled skirt. I narrowed the inset slightly to remove those seams reducing the lower inset by 1-inch on each side. I top-stitched all of my seams to reduce bulk. 

I considered a three color back, but opted to skip it given the sparkle in the front. In a stroke of fortune, the seam lines from the skirt lined up with the back darts of the back bodice.


I liked the look of the neckline as it is in the pattern. When I tried it however, I felt it was too close and sat uncomfortably on my collarbone. I cut the front collar on the fold of the leg seam. That factored into the comfort and led to me lowering the front and back neckline by 1-inch.
                                

The drop waist on this dress is not a style to which I normally gravitate. I think however, this pattern is a perfect match to maximize the beaded leg panel.


I am really pleased with this finished dress. Do you know what the best thing is? Jeans have two legs! I have another panel to use on another refashion! I don't know what it will be, but I know it will be fun! 


Voting is open now. Click here to cast your vote! I appreciate it! 

Happy Sewing,
Bianca

Sunday, May 25, 2014

Sewing in my Time Machine: Retro Racer-back Dress

It is official, I have more vintage patterns in my stash than I do current patterns. I love the styles, the one size patterning, durability of the pattern paper and abbreviated instructions. When looking for a new sewing pattern, more often than not, I gravitate toward the retro. PR is hosting a Vintage Pattern Contest and I am thinking of entering it.


I have the iconic DVF Vogue 1549 wrap dress in my stash. I know, how fortunate am I? I have seen it selling for $150+ and I wanted to give it a try. I began working on a muslin (ack I never do muslins!) in hopes of perfecting it.

          http://media-cache-ec0.pinimg.com/236x/97/05/d4/9705d41b90dfc14d7b76a2225904ddff.jpg

The muslin is working in that it is clearly showing me what does not work. The neckline is too low and deep for my taste. After failed attempts to correct it, I have converted it into a maxi wrap skirt, (read hacked the top off in frustration and left the skirt in a pile on the floor). I still have a few days to revisit it, so I hope to get it together and make it the way I want in my fabric of choice.

In the meantime, I needed a project to clear my mind. I reached for another retro pattern. This time I decided to switch up Simplicity 5308, a racer-back dress ideal for hand-sewing. It is a very simple dress that I jazzed up with a bit of light beading.

 http://farm4.staticflickr.com/3195/3142599942_247762f4c9_b.jpg

Here is a review of the pattern with the photos of me wearing it.

What year is your pattern from? (Or decade if you can't date it precisely)
1972

Why did you choose this pattern?
I thought the simple silhouette and lines made it a good candidate for hand-sewing. The four seams and racer back are perfect for top stitching.

If you used any vintage techniques or fabrics please tell us about them.
I used the vintage technique of hand-sewing.

What made this pattern different/more difficult/easier or more interesting than a modern pattern?
I am not sure about the dart placement on this pattern. They are more like arrows pointing down to the breast. It didn’t seem to add to the structure of the dress. It is a short dart and did not take away from the dress, so I kept it in.

Pattern Description:
Misses’ Jiffy Knit Dress or Jumper in two lengths. The top-stitched short or long jumper or dress with “cut-in” armholes has “u” shaped neckline, pockets in side seams and button trimmed, snap fastened shoulder extensions.


Pattern Sizing:
My pattern is a size 12 bust 34. I made a single layer dress looser fit, I was happy with the fit of this dress. For a double layer jersey dress, that would be embellished and more fitted, this would have been too loose. My rule of thumb for close-fitting, hand-sewn jersey dresses. Is go up 1 from your RTW size.

Did it look like the photo/drawing on the pattern envelope once you were done sewing with it?
In the shape yes.

Were the instructions easy to follow?
I did not use them but, for the sake of answering this question, I looked at them. They are wonderfully clear.

What did you particularly like or dislike about the pattern?
If you look at my Retro pattern reviews, you will likely see the same elements in them.

*Maxi length

*Top-stitching

*Pockets

*Interesting necklines.

My dislike is the snap closures at the shoulders. It is unnecessary in a dress with a deep scoop neckline and constructed in a knit.
Fabric Used:
A single layer of cranberry colored cotton jersey. 


Suggested fabric types:Stretchable double knits of polyester, wool or blends.
Pattern alterations or any design changes you made:
*I hand-stitched the dress in a running stitch and using Navy blue button and craft thread. I top-stitched the seams and felled them to the inside.

* I omitted the need for the shoulder closures by sewing them together.

*I omitted the facings and chose instead to finish the neckline with bias bindings. The arm openings were secured using a simple parallel stitch. For the neckline, I added black glass beads to my parallel stitches.

*I did not add the pockets. I prefer floating side seam pockets on my jersey dresses and I thought they would add bulk at hip level.

Would you sew it again? Would you recommend it to others?
I made the short version to mix things up in my wardrobe. I will likely make it in a double layer maxi length with embellishments. This is a really great project to wet your whistle in hand-sewing. It is sewn with a basic running stitch and the parallel stitch on the bindings is the easiest to learn. 

Dress front.

Dress with racer back detail 

Stitch and bead detail.

Back stitch detail.


As you know I have made many elaborately stitched pieces. I entered one of them in the SewStylish Spring Fashion Challenge and am 1 of the 5 semi-finalists. The voting closes June 6 and if you feel like sharing some love my way, you can do so by voting here.


Happy Sewing!
Bianca


Monday, January 13, 2014

Beading Woes and Wins in my Anna's Garden Poncho

Oh the troubles of beading an Alabama Chanin piece. The dilemma comes from finding a needle that is large enough to accommodate the thickness of the button and craft thread but narrow enough to fit through the bugle and seed beads. In the past I have found needles that work but I lost the package and didn't know what type they were  when I needed to replace them. 

I did some research and asked around on Craftsy for suggestions for good needles. I got suggestions for big eye needles. 


They have a collapsible eye and a narrow body to fit the beads. These work great in that they accommodated the button and craft thread easily, however because they were so flimsy they would bend and made the process very slow going. 

I then switched to the Sullivan's beading needles. They were thin enough to accommodate the seed beads but the eye was too small. I ended up using another needle to enlarge the eye and it worked for a time. The problem with this needle though was that going through the layers of jersey fabric, over time it would begin to arc and bend. This made for a slow process is well forcing me to stitch one running stitch and bead at a time.


I asked Dr. Fun what type of needles she was using and she pointed me in the direction of the Dritz Milliners needles. When I went to the fabric store though I forgot if she said embroidery or milliners. So, after debating for quite a while, I decided to go with the embroidery needles because the eye was  larger and the body of the needle is really narrow. I figured if I got it wrong I'd be back at the store if I needed to replace them.


Turns out the size 5 embroidery needle was perfect!  The steel is firm and the needle is short so it allows me to be easily work through the fabric without the needle arcing.  This needle allowed me to stitch a beaded back-stitch as opposed to a single running stitch every time.  It is hard to explain the difference, but in the time it took me to do one shape with the wobbly needles I was able to complete three shapes with the firmer needle.

My husband put some compression sewing gloves  in my Christmas stocking.

Compression Glove with double-sided tape as my beading glove.
I put them, and my needles too good use on my new poncho. With this poncho, I used a tan top layer stenciled with brown airbrush paint using the Anna's garden stencil and a white under layer. I used three types of beads in color combinations of white, silver,  and clear iridescence.


My label on scrap jersey.
I chose to use reverse applique in random shapes while leaving some shapes unstitched and unbeaded. 
Front on my custom dress form
Back
I am sure to return to this piece over time, adding more beads and stitches. For now, I am happy with it. 

Happy Sewing,
Bianca

Monday, October 28, 2013

From a Four Panel Swing Skirt to Paisley Corset

My very first embellished Alabama Chanin project was started three years ago and was overly ambitious. I decided to make the four panel swing skirt from the Alabama Stitch Book. My plan was to use a reverse back-stitch with embroidery floss to sew a negative reverse applique. I decided to use the Paisley stencil because it is a large scale design and I thought I would finish quickly.
I used a spray bottle and red fabric paint to transfer the designs to my fabric. I can't remember now which paint, but it was too thick and sat on top of the fabric making it a bit hard. At the time I was too new to this whole thing to know it was a poor paint choice. I used six strands of embroidery floss for my reverse back stitches (it should have been done with four). The density of my floss coupled with the double layer of fabric made it slow going. In addition, the tension of the fabric and thickness of the thread did not make a smooth process. Over the course of a few months I got two and a half panels of the skirts stitched.

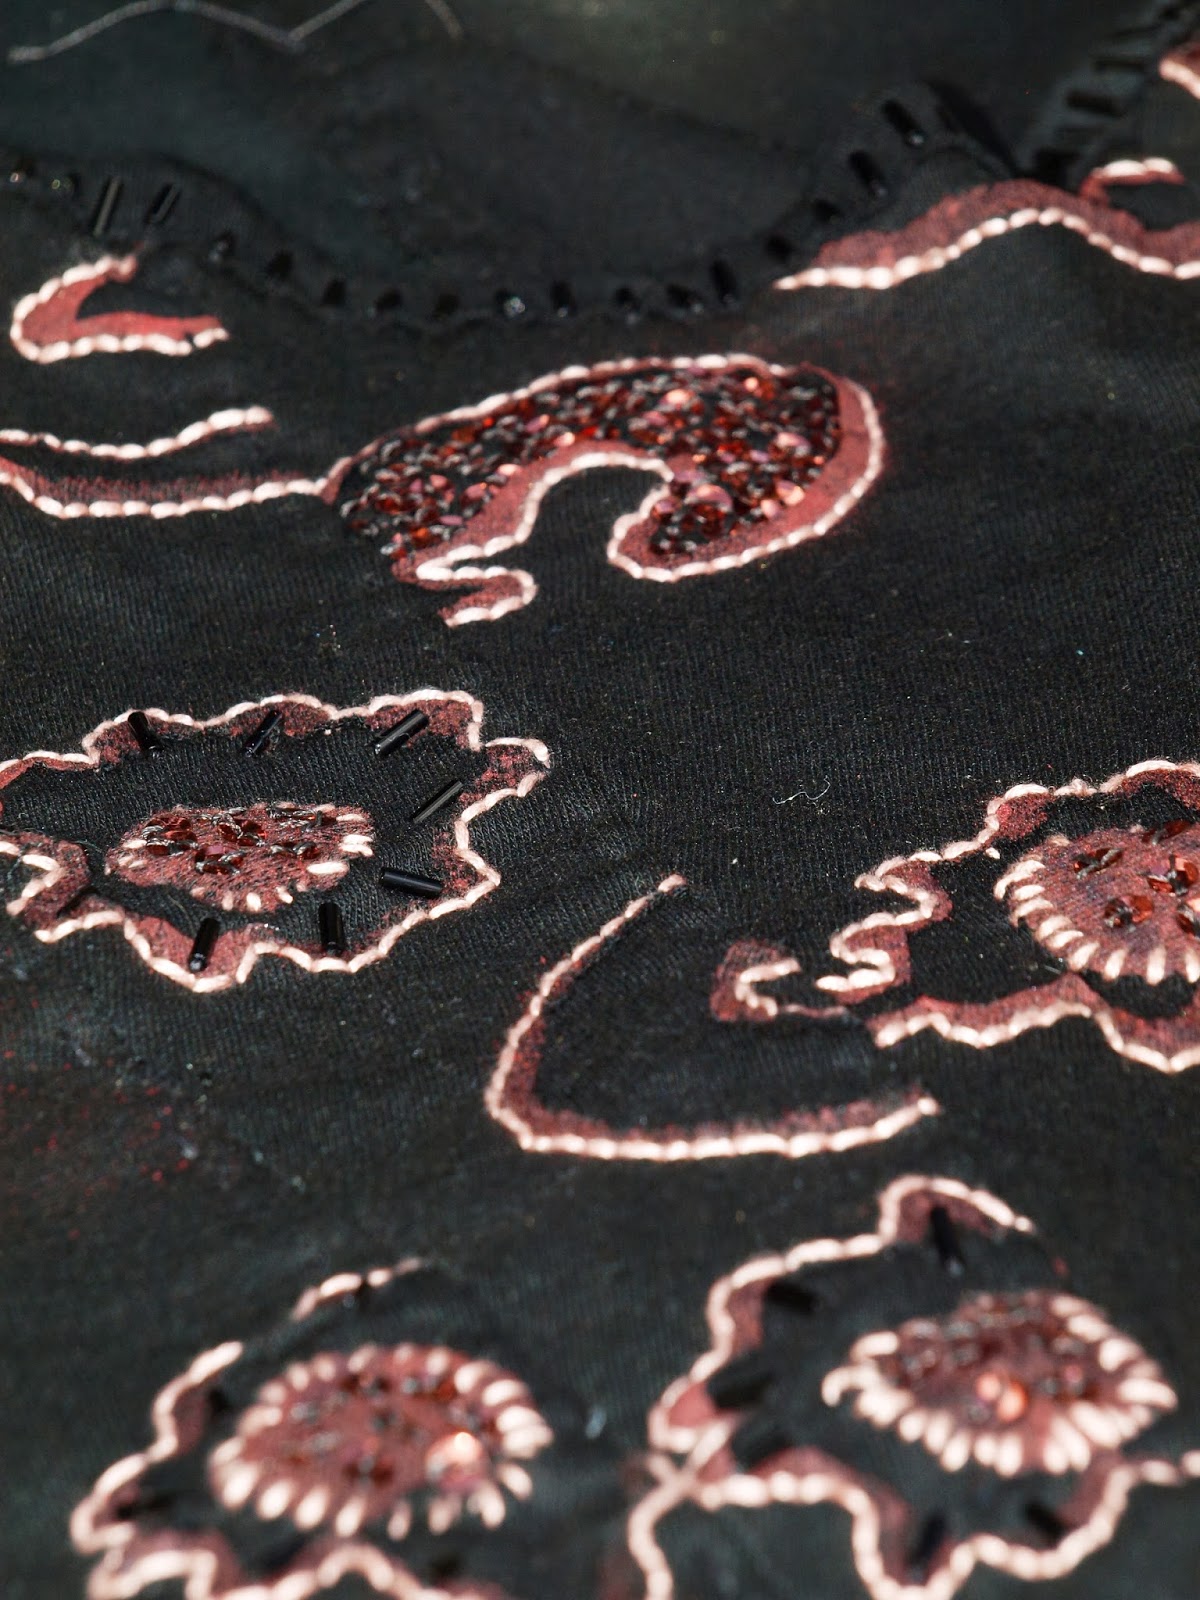
As time went on, I realized that this was not a project I wanted to complete. I put it in my unfinished projects pile where is mocked me for almost 3 years.  After redeeming my polka dot caplet I got inspired to breathe new life into this project. Rather than continue with it as a skirt, I decided to transform it into another corset. Fortunately, I had enough of the panels finished to make it! I choose to  embellish the front only using black bugle beads and copper colored sequins to embellish specific features of the paisley design.

Adding sequins with my handy dandy beading glove made from the sleeve of a sweater and double sided tape.

Sequins and Bugle beads along the neckline.


I followed the instructions outlined in the book and stitched the corset in a double layer of cotton jersey.
For this version, I did not raise the depth of the neckline like I did last time. The parallel stitches with beads along the neckline  keeps it from shifting too low. When I make the corset again, and I will, I will  cut it higher as before.


I am very satisfied with the re-purposing of my unfinished skirt into this corset! I am even happier to have one less item in my work in progress pile.


Happy Sewing!
Bianca

Wednesday, October 23, 2013

When life gives you lemons, cover them in beads.

Over a year and a half ago I made the caplet featured in the out of print Butterick  5843. 


Alabama Chanin had just launched its a line featuring polka dots and I thought I'd give it a try. I did not have an airbrush so I painted the fabric using my old timey spray bottle method. This method was hit or miss for me. Sometimes I got the paint to stay within the stencil shape, but other times it leaked out over the side. 


The spillage seamed minor and given that I was still new to AC hand-sewing, I decided to press on with this project. I used a double layer of jersey cotton; grey underneath and a denim blue on top.  I stenciled black paint to color the polka dots. To secure the layers, I used embroidery floss and a reverse back stitch. Some shapes had two layers of embroidery floss in grey and white. 

After some time I finished the cape. On one hand, I was happy that I finished a project, but on the other hand I was not happy with the paint. In those days, my sewing results were hit or miss and I was just happy to be advancing in my sewing and using pieces they didn't necessarily work as practice. So, I finished the cape and put it in my closet where it hung unused.

Fast forward to the present day and Natalie's Craftsy class. When she got to the topic of beading she mentioned using beading as a decorative element, but also as an aid to help hide mistakes! This gave me the brilliant idea to bring some new life into this forgotten project. I would use beads to cover the spillage of the paint and hopefully get a wearable garment. I used a mixture of bugle beads, chop beads, and sequins to create random half-beading along the outside of the stenciled shapes and embroidery stitches. This did wonders to hide the paint that bled through the stencil.

Beading on the outside of the polka dots.
 
Double reverse back-stitched shapes
Cape Front with a cross stitch binding along the neckline and front
Cape Back
The original cape was secured with jersey ties. I decided to swap that out for a jersey covered button and elastic loop. I am pleased with the result and will not allow this to hang out in the back of the closet anymore.

Happy Sewing,
Bianca

Monday, September 16, 2013

Beaded Alabama Chanin Polka Dot Sampler

Hello, my name is Bianca and I am an addict. All the readers say "Hi Bianca!" In my varied and storied career I have spent some time as an Addictions Counselor, Case Manager, and Group Leader, so I know the signs. I can unequivocally say I am addicted to sewing Alabama Chanin garments. They are beautiful, creative, and wonderfully detailed. I work multiple garments at a time relishing the various techniques required for each. I have many garments cut and queued waiting their turn to be stitched. I have a longer queue of garments I dream of sewing, but have yet to cut. 
I am in constant need of a fix. I was at a doctor's appointment and required to wait. The waiting grew longer and more difficult to endure because I didn't have anything to sew! I kept thinking, I could have stitched four circles by now! Call my name! (BREATHE).  I recall the tools I have been trained to use and I have learned to always have something handy. :)
 
There is a Mini Wardrobe Contest running over on Pattern Review.com. The contest requires participants to complete four garments that must combine (without adding additional garments) to create at least 4 looks. I have entered and plan to  sew a mini Alabama Chanin Wardrobe. I plan to make a dress, a jacket, a top, and skirt to produce the following 4 looks: Dress; dress/jacket; skirt/top; skirt/top/jacket.

The kicker is that I have one month to do it! I know it is insane. I have been working on this dress for almost a year; what am I thinking? In any case, I started mentally planning my entries when the contest was announced. On September 1, I began my sewing of the top entry.

I wanted to work on my beading techniques and decided to  use my top as a sampler. I used the t-shirt pattern from the Alabama Chanin Studio Sewing and Design book. I used my polka dot stencil to add the shapes to a single layer of slate grey cotton jersey.

Polka Dot Stencil

Dots applied.
I got to work on the embellishments. I used red embroidery floss to work reverse back stitches to serve as the foundation of the polka dots. I then used an assortment of seed, chop, bugle, beads and sequins to create various beaded arrangements.


These patterns combined to create this finished top. It is hand-stitched with slate button and craft thread. The seams are felled to the inside and top-stitched. The neckline is bound using a Cretan stitch.

I am satisfied with the outcome of the top at this point. I may add more sequins and beads in the spaces over time. If I get the other entries completed, I may add them before the contest ends! Bahahahaha! What grandiose thinking! I need a meeting!

Happy Sewing!
Bianca