Monday, October 28, 2013

From a Four Panel Swing Skirt to Paisley Corset

My very first embellished Alabama Chanin project was started three years ago and was overly ambitious. I decided to make the four panel swing skirt from the Alabama Stitch Book. My plan was to use a reverse back-stitch with embroidery floss to sew a negative reverse applique. I decided to use the Paisley stencil because it is a large scale design and I thought I would finish quickly.
I used a spray bottle and red fabric paint to transfer the designs to my fabric. I can't remember now which paint, but it was too thick and sat on top of the fabric making it a bit hard. At the time I was too new to this whole thing to know it was a poor paint choice. I used six strands of embroidery floss for my reverse back stitches (it should have been done with four). The density of my floss coupled with the double layer of fabric made it slow going. In addition, the tension of the fabric and thickness of the thread did not make a smooth process. Over the course of a few months I got two and a half panels of the skirts stitched.

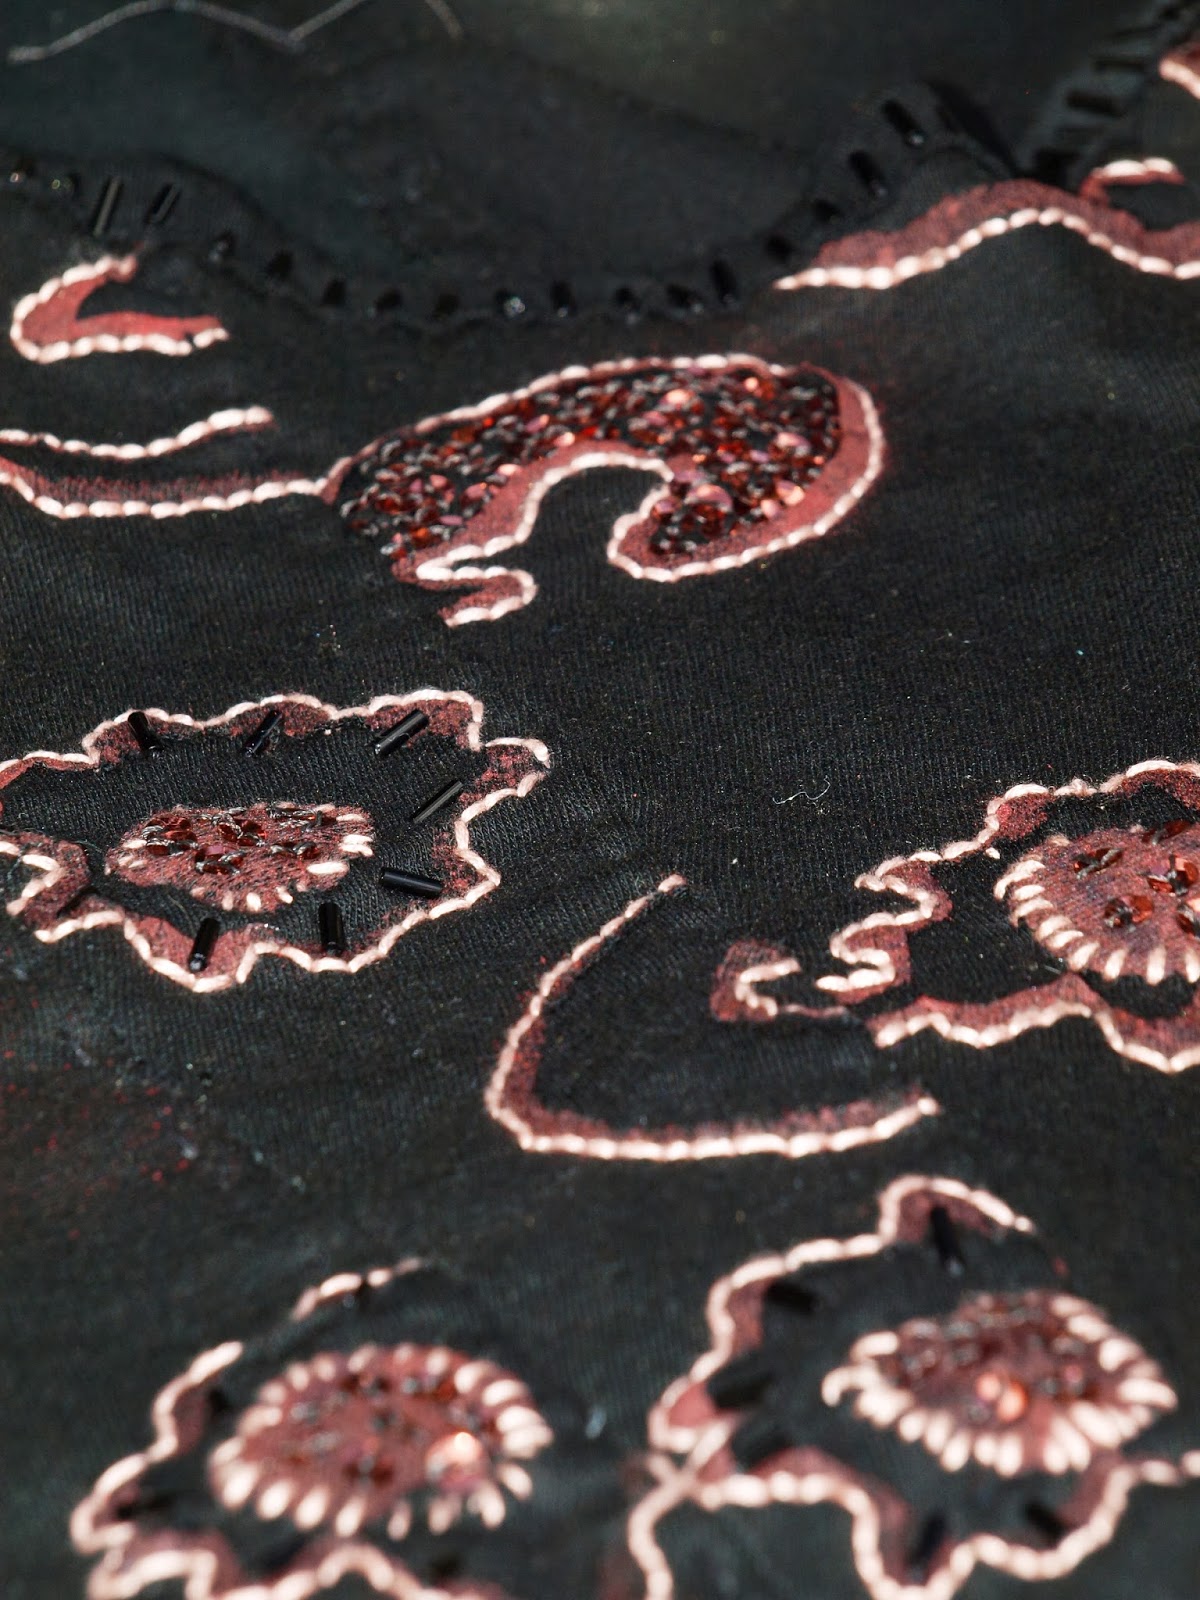
As time went on, I realized that this was not a project I wanted to complete. I put it in my unfinished projects pile where is mocked me for almost 3 years.  After redeeming my polka dot caplet I got inspired to breathe new life into this project. Rather than continue with it as a skirt, I decided to transform it into another corset. Fortunately, I had enough of the panels finished to make it! I choose to  embellish the front only using black bugle beads and copper colored sequins to embellish specific features of the paisley design.

Adding sequins with my handy dandy beading glove made from the sleeve of a sweater and double sided tape.

Sequins and Bugle beads along the neckline.


I followed the instructions outlined in the book and stitched the corset in a double layer of cotton jersey.
For this version, I did not raise the depth of the neckline like I did last time. The parallel stitches with beads along the neckline  keeps it from shifting too low. When I make the corset again, and I will, I will  cut it higher as before.


I am very satisfied with the re-purposing of my unfinished skirt into this corset! I am even happier to have one less item in my work in progress pile.


Happy Sewing!
Bianca

Wednesday, October 23, 2013

When life gives you lemons, cover them in beads.

Over a year and a half ago I made the caplet featured in the out of print Butterick  5843. 


Alabama Chanin had just launched its a line featuring polka dots and I thought I'd give it a try. I did not have an airbrush so I painted the fabric using my old timey spray bottle method. This method was hit or miss for me. Sometimes I got the paint to stay within the stencil shape, but other times it leaked out over the side. 


The spillage seamed minor and given that I was still new to AC hand-sewing, I decided to press on with this project. I used a double layer of jersey cotton; grey underneath and a denim blue on top.  I stenciled black paint to color the polka dots. To secure the layers, I used embroidery floss and a reverse back stitch. Some shapes had two layers of embroidery floss in grey and white. 

After some time I finished the cape. On one hand, I was happy that I finished a project, but on the other hand I was not happy with the paint. In those days, my sewing results were hit or miss and I was just happy to be advancing in my sewing and using pieces they didn't necessarily work as practice. So, I finished the cape and put it in my closet where it hung unused.

Fast forward to the present day and Natalie's Craftsy class. When she got to the topic of beading she mentioned using beading as a decorative element, but also as an aid to help hide mistakes! This gave me the brilliant idea to bring some new life into this forgotten project. I would use beads to cover the spillage of the paint and hopefully get a wearable garment. I used a mixture of bugle beads, chop beads, and sequins to create random half-beading along the outside of the stenciled shapes and embroidery stitches. This did wonders to hide the paint that bled through the stencil.

Beading on the outside of the polka dots.
 
Double reverse back-stitched shapes
Cape Front with a cross stitch binding along the neckline and front
Cape Back
The original cape was secured with jersey ties. I decided to swap that out for a jersey covered button and elastic loop. I am pleased with the result and will not allow this to hang out in the back of the closet anymore.

Happy Sewing,
Bianca

Thursday, October 17, 2013

Flutter Sleeve Cowl Neck Dress

I love estate sales. I get a daily email telling me of the sales in my area. I have to be selective of the ones I choose because it is hard to shop with the little ones. I recently went to a sale for a 90+ year old sewist. Her stash included crochet doilies laces, trims and boxes and boxes of fabric. The laces and crochet doilies were stored inside the house. Unfortunately, the fabrics were stored in cardboard boxes in the garage.

I happily sorted through the items inside the house selecting many wonderful treasures.  I then went outside to look at the fabrics. Because they were stored in cardboard boxes outside, the items on the top and the bottom of the boxes were damaged. The top items looked awful, there was mildew, silverfish and other little creatures. I was grateful that I had taken my allergy medicine that morning and that the middle fabrics were in good shape.

The person hosting the sale was excited to have ANY interest in the boxes so she immediately told me that I could have whatever I wanted for $1 per piece of fabric. It was all I could do, not to do a happy dance in front of her. I did not want to alert her of her folly. I made a show of dusting them off and disregarding what I did not want. All in all, I found some gems. When I was done I had enough fabric to fill my washer on the maximum load, twice! I was very happy and so was the seller. Here is a sampling of what I got.

Laces and trims. Please help me figure out what to do with them.


There were some great knits in the mix and I wasn't certain what I was going to make but I was excited to add them to my stash. Since the sale, I've kept my eye out for patterns that required knits that work and discovered this simplicity pattern:


The dress and top in views D, and E, appeal to me. I knew I wanted to combine them to make a dress. I like the flutter sleeves and the pleats at the top of the cowl neckline. This dress was very easy to make and was fast to come together.

Here are my thoughts on the pattern and photos of the finished garment.

Pattern Description: 1716 Misses' Knit Top and Mini Dress.  Misses' knit mini-dress, tunic and top can be made with a front twist or draped neckline with five different sleeve variations to choose from.

Pattern Sizing: 4-20. I made a 10 straight. 

Did it look like the photo/drawing on the pattern envelope once you were done sewing with it? Yes. I made View E in dress length.

Were the instructions easy to follow?
Yes. I liked the instructions on the sleeve insertion.

What did you particularly like or dislike about the pattern? This was super fast to make. I liked the shoulder pleats and that the depth of the cowl was not too low.

Fabric Used: A knit fabric I got at an estate sale.

Pattern alterations or any design changes you made:  I added six inches to the length of the dress. I am 5'8 and the dress needed the extra length.

Would you sew it again? Would you recommend it to others? Yes. I really like it.

Conclusion: Nice wardrobe builder.

Simplicity 1716


Pleats at the shoulder and flutter sleeve.

I am so so thrilled with my dress! The fabric cost $1 and I bought the pattern on sale for $1. I feel like a million bucks in my $2 dress!

Happy Sewing!
Bianca

Tuesday, October 1, 2013

Pattern Review Mini Wardrobe Contest Entry

I finished my entries for the Pattern Review Mini Wardrobe Contest. I began the month hoping to rise to the challenge of hand-sewing four garments in as many weeks. I honestly did not think I would get it all done in the allotted time. I was however, blessed with napping kids and a hubby watching football some nights. 

I made  a Alabama Chanin Corset and Long Skirt, and a dress and a jacket all hand-stitched in Alabama Chanin Style.

The four items combine to create the following outfits:
*Corset, skirt
*Dress
*Dress and jacket
*Corset, skirt, jacket
*Jacket, skirt 

I am very pleased with my results, especially the jacket and dress.They all go so well together. Here are pics of me in my new wardrobe.


The voting begins on 10/04/2013 and ends 10/10/ 2013. Here is the link to the contest gallery. Be sure to see the other entries and cast you vote for me! 

Happy Sewing!

Sunday, September 29, 2013

Alabama Chanin Anna's Garden Corset and Long Skirt

I have always liked the hand-stitched corset from Alabama Stitch Book. For whatever reason, I never made one didn't think I would. That was until I saw a version made by  Nixxi, on Craftsy. She embroidered the June's Spring design to her sand colored fabric and stitched it using a baby blue colored embroidery floss. I think her end product is delightful and it brought this pattern back into play for me.

Even after making my beaded sampler top, I decided to change my entry for the mini wardrobe contest to include a corset. I had a white cotton jersey sheet in my stash that would serve as my fabric source.  I stenciled my fabric in "Anna's Garden" using  grey paint I blended. 

Painting the fabric
The pattern for the corset is from the Alabama Stitch Book and includes all the instructions to create this corset top and a multitude of other garments. They are sized xs-xl. I traced and I cut the size medium.


 I find A.C. necklines too low for my tastes so  I raised it about 1 inch. I sewed my corset with double stitching; once to secure it then again to top stitch. I had my seams fell to the inside of the top.    I chose to bind my neckline and armholes using a strip of white jersey fabric.  I secured the binding with a herringbone stitch using slate button and craft thread.
Anna's Garden Corset Front
  I really like the rounded hem on this.

 I am glad I raised the neckline and think it could still go up just a smidge more.
Herringbone stitch on bindings
Stencil close up
I am happy with my corset and the fact that the only significant alteration to the pattern was raising the neckline. It was really quick to stitch and I will certainly be making more.

To go with this lovely top, I needed a coordinating skirt. I selected the Long Skirt option from Alabama Studio and Sewing and Design. 

I had not made this pattern and thought it went great with the top. I love that the front is shorter than the back which has a train. Again, I made this by re-purposing the white jersey bed sheet. I traced and cut the pattern and began sewing.

The construction was easy but a tiny bit tedious. The seams are super long and needed to be stitched once with the seams inside, then, stitched again on the outside. After the sides were stitched up, I added fold over elastic (foe) to the top waistband. The pattern called for 1 1/2 in foe, but I didn't have any. I bought a spool 3/4 of  foe elastic on sale and a ridiculous price years ago and decided to use what I had on hand.

It was a bit fiddly to work with, but basting it in place instead of pinning, solved that problem. I attached it using a parallel stitch.
 Here is the finished product.
Skirt Front
 
Skirt back (I am stooping so the curve can be seen better.)

I really like this outfit! I will be making this again, and again. As we come upon the holiday season, this has been added to my gift giving list. Are you my friend?

Happy Sewing,
Bianca