Saturday, May 18, 2013

Quilted Bag with leather strap

I love love love handbags! I love handbags, like some women love shoes. I wouldn't say I am a hoarder, but I have more than my hubby would say is reasonable.  I love making them and have a stash of patterns and many books from which to choose. I haven't made a bag for myself however, in over a year! Hubby gifted me a fantastic Louis Vuitton Neverfull bag last year, so I haven't felt the need to scratch a handbag itch since then.

One of the projects my students complete during our round of lessons is a bag. I have a go to bag pattern that I have used in the past, but recently, we chose a new one. McCalls 6668  Cell Phone/Computer Sleeve and Bag by Nancy Zieman is the one. This pattern features four options of bags to be made with double-sided quilted fabric. The cute little bags in this pattern got me excited again about making bags for myself!

Double-sided quilted fabric is not particularly inexpensive at about $20 per yard. I have bought it in the past and will do so again, but for a new pattern for a lesson, I wasn't willing to do so. I wanted to test it before going to the expense. I found this sweet deal at Marshall's. It is a set of  2 quilted pillow shams in a color pallet I like. The clearance price is $12, but I got it for $2 with a $10 reward coupon!


The shams had enough fabric to accommodate the bag in View C that the students and I made.


Print detail

 The pattern required making a strap from the quilted fabric, but the color tones just screamed brown leather accents to me. I had a leather belt in my stash that I bought at a thrift store I just knew I could use as a substitute.  I removed the buckle and simply threaded the lower tab into one of the loops on either end. I folded it down and then secured it to the tab.


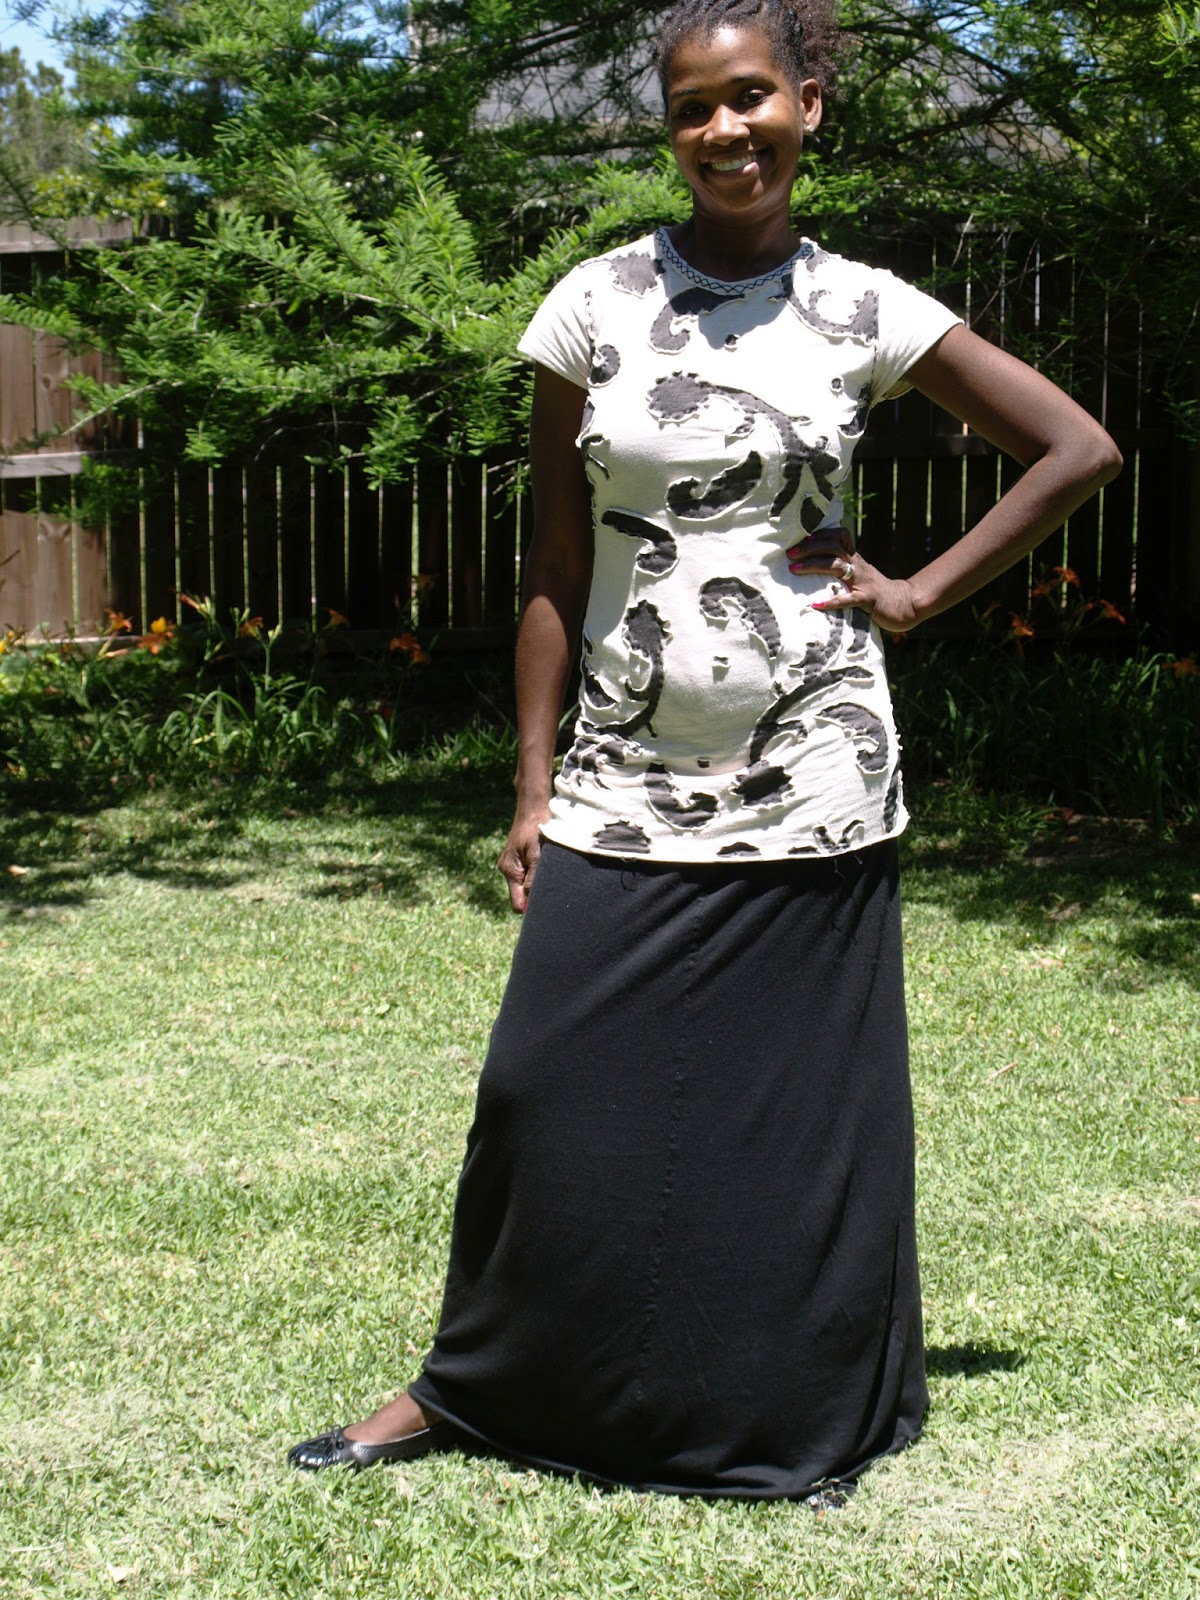
Here is the completed bag!


The strap is long enough to be a crossbody bag!


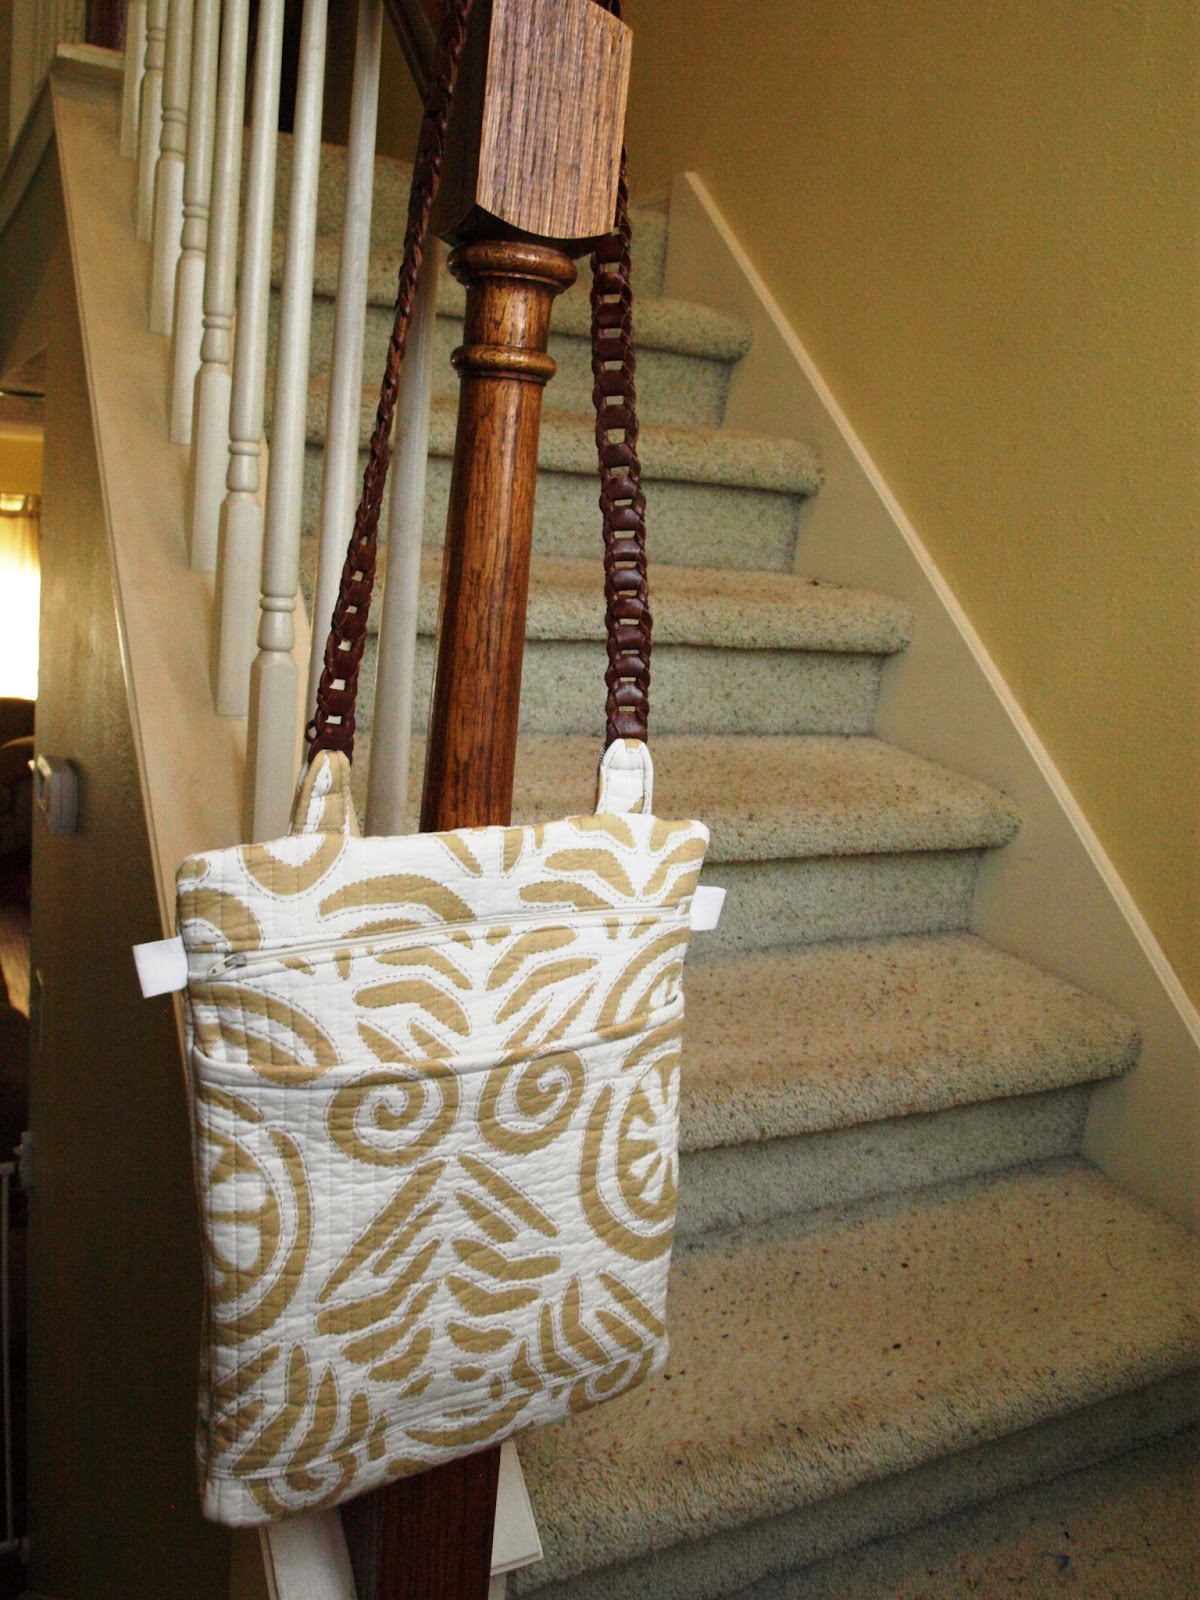
I love the look of the strap! It really classes it up! I like the details of the pattern too! The zipper ends were a pain to figure out initially and seemed unnecessary considering the zipper fit as is, but I love them. The zipper pull tabs are elements that could be omitted, but are really handy.


Here is my review of this pattern.


 Pattern Description:

CELL PHONE/COMPUTER SLEEVES AND BAGS: Cell Phone Sleeve A: 31/2"W. x 5"L.. Computer Sleeve B: 9"W. x 14"L.. A,B have contrast binding. Crossover Bag C: 12"W. x 131/2"L.. Saddle Bag D: two 12"W. x 131/2"L.. Measurements are approximate and exclude straps.
Designed for Double-Sided Pre-quilted Fabrics.
SUGGESTED FABRICS: Double-Sided Pre-quilted Fabrics. Contrast A,B: Cotton/Cotton Blends.

Pattern Sizing:
One Size

Did it look like the photo/drawing on the pattern envelope once you were done sewing with it?
Yes, with the exception of the leather shoulder strap I added.

Were the instructions easy to follow?
Yes. The zipper tabs installation was a bit tricky, but not terrible.

What did you particularly like or dislike about the pattern?
I used this pattern in a lesson and liked how satisfied my students were with their results. The bag is very roomy and current. I disliked that sewing through the layers at points was very difficult on older machines. My student broke needles when sewing over the strap tabs. I suggest staggering the thickness so it is not as thick in that area.

Fabric Used:
I used a quilted pillow sham

Pattern alterations or any design changes you made:
I substituted a leather belt for the fabric strap called for in the pattern.

Would you sew it again? Would you recommend it to others?
I would definitely recommend this and I will make it again.

Conclusion:
This pattern is good for a guided beginner.  

Happy Sewing


Saturday, May 11, 2013

Reversible Toddler Girls Dress

When Little Miss was one, I made her several baby dresses from the New Look 6793  pattern. They were quick to sew and super cute on her. At that age, she was prone to being a bit messy and I found packing an extra set of clothing bulky (I also sometimes forgot to pack extras). To get me out of the quick-change jam I often found myself in, I decided to make her clothing reversible. That way if she got a food spill on something, presto-chango; flip it over and new clean side! It worked well for us and as she got older, the need for reversible clothing reduced.

Recently, I found her attempting to get dressed in one of these too small dresses of long ago. She knew it wouldn't fit, but liked the dress so much, she thought she would give it a try.  Recognizing failure, she asked that I make her another reversible dress. I explained that the pattern was too small, but she could choose something else for me to make. She did not want one of the million patterns I own. Rather, she insisted that I could figure it out and make a pattern in her size. So that is what I did! 

The pattern was two main body pieces so I simply used  them as a base and drafted a new one by extending the length and width of each. I guess I  added 4 inches around and 6 inches down. It was super easy (So easy that I will not expand here. Most of my blog traffic comes from sewing theme websites, so I assume you know to do this. If not, please leave a comment and I will expand.)

I used a print for one side. One the other, I added a simple applique using the print fabric . Here is Little Miss in the dress and a pattern review follows.


Pattern Description:
This is a pattern for a baby/early toddler dress/jumper, top and pants.

Pattern Sizing:
Baby NB-L . I used the pattern for the large and graded up to a size four.

Did it look like the photo/drawing on the pattern envelope once you were done sewing with it?
Yes, although I did a different applique and I made the dress reversible.


Were the instructions easy to follow?
Very easy and very easy to adjust the size.

What did you particularly like or dislike about the pattern?
I really like this pattern overall. It was easy to use and straightforward. It allows for tons of creativity with the applique options and ease of making it reversible. I wish the pattern came in larger sizes for a child, but grading the pattern up was not a problem.


Fabric Used:
Blue Chambray Cotton from a resale store and a print fabric from Hobby Lobby. For the applique I used various scrap fabrics and rick-rack.

Pattern Alterations or any design changes you made:
I altered the size up to a 4t. I used the tulip applique from another pattern.

Would you sew it again? Would you recommend it to others?
Since I have now drafted the pattern, I will make it again. Little Miss loves this type of dress and has requested more. I recommend it.


Conclusion:
This is a great, versatile pattern; easy to sew for all levels.


Happy Sewing!

Wednesday, May 8, 2013

Alabam Chanin Paisley Tee and Maxi Skirt

I am at it again! I so loved my Angie's Fall tee that I made another tee using the Paisley stencil this time. I constructed it in tan jersey painted with black paint. The front is constructed with a double layer using the applique technique. I used a cross stitch to bind the neckline using black button and craft thread.


Neckline and Stitch Details

I love how the edges curl up.

For this shirt, as with the other, I cut the size medium and sewed a 5/8th seam allowance into the shirt when I constructed it. So the sizing is midway between the small and medium sizes. I found that to be the perfect sizing for me; not too tight, not too loose. I cut the front and back pieces about six inches longer than the pattern suggested. I knew I would wear it with a maxi skirt, so wanted a tunic length.

I love this shirt! It was fairly fast to put together and only took 2 weeks of evening and free time sewing. Using a running stitch rather than a reverse back stitch makes such a difference in terms of speed. It is so rewarding to complete a garment from beginning to end in this way. Tracing the pattern, cutting, painting, embellishing, and sewing it all by hand is well worth the effort.


The maxi skirt was made using vintage Butterick 6170 that I found at a resale store for $.10. I used black jersey fabric that was a gift from my grandmother-in-law. I made the skirt pictured in view A. I decided not to use the pattern from the Chanin books for the skirt because frankly, this was the path of least resistance. It was already cut and had an even hem. The A.C. skirt pattern that was traced and cut has the slight train and I didn't want that look here.  


I hand-sewed it in the A.C. style using button and craft thread. I changed the pattern in a couple of ways. I omitted the zipper, facings, and darts. I also added a front and back seam in the middle of each cut skirt panels. The cut pattern is a size 12, so by adding the two seams and a 5/8 seam allowance I took it down to about a 10ish. I bound the waist band using 5/8 inch fold over elastic and stitched using a parallel stitch. I did not hem it, but allowed it to roll on itself. I am 5 foot 8 inches tall and found this length perfect for me.


Seam Detail


I will likely be making this again in different colors. I am sure I will be making more shirts, so the skirts will naturally follow.

 Happy Sewing

Monday, April 29, 2013

Alabama Chanin Fitted Tank Dress

One of the first items from the book the book Alabama Chanin Studio Sewing and Design that I fell in love with is this paisley dress. I have been hesitant to make it because of all of the hand sewing involved. Rather than make the fully detailed dress I decided to make an un-embellished muslin.


The pattern came from the third book. For this dress, I cut the size medium and sewed a 5/8th seam allowance into the dress when I constructed it. So the sizing is midway between the small and medium sizes. I found that to be the perfect sizing for me; not too tight, not too loose.

I used tan colored jersey fabric and "natural" color button and craft thread. I sewed it completely by hand using running stitches. I felled the seams to the inside and kept the knots unseen. I bound the neckline and arms using the cross stitch.


stitch details


Cross stitch detail


I love the shape of the dress and the hem that is long in back and slightly shorter in front. I do not like that the neck line is so low. I cut it higher, but had to readjust it after binding it. The higher neckline flopped over. I redid it by re-cutting to the original depth. 

Full length Fitted Tank dress

Long hem/ train in back


I recommend this dress for a thinner person. This dress is not very forgiving on the figure. I added a poncho I made last year. It works well to hide issues a cheeseburger could produce.
Worn with poncho


Pin-tuck poncho back

I will make this dress again. I think I will make it in a dark color in the paisley design. I do not know when I will start it, but my anniversary is coming up. That may be an incentive to get stitching.

I am very pleased that I was able to tick this off of my list.

Happy Sewing

Sunday, April 28, 2013

Fast sprint to the end of the Sewing Pattern Review Contest.

As the Pattern Review Pattern Busting contest winds down, I realize I have neglected to review a couple of patterns I completed. Here as I sprint to the end, are those reviews.

First up is the Brocade Circle Dress McCalls 5033: Perfect for twirling!

Twirling


Front


Dress back

Pattern Description: Children's' dress in 2 lengths

Pattern Sizing: Children 3 to 12 (I made the 4)

Did it look like the photo/drawing on the pattern envelope once you were done sewing with it? Yes with omissions.

Were the instructions easy to follow? Yes and no. I was easy for me as I have inserted a lining like this before. I was sewing this with students and they found the instructions on the lining difficult. The pattern called for constructing the bodice by turning under 5/8 at the armhole and topstitching it. With my help, they were able to do it, but all said that without my help they would have been lost.

What did you particularly like or dislike about the pattern? I liked that this pattern had a full skirt that my daughter liked. I disliked that the length of the bodice seemed short. I would have preferred if it came down to the bellybutton. I found the length of the skirt was too long on the long, but too short on the shorter length. If I make this again, both will need to be lengthened. 


Fabric Used: Silk brocade that my sister bought in Indonesia. 


Pattern Alterations or any design changes you made: I omitted the skirt lining and ruffle. I had intended to sew them, but as I went along changed my mind. I found the density of the brocade with the other elements would have been too much fabric.


Would you sew it again? Would you recommend it to others? I am on the fence about making it again. Little Miss loves it, but I have many more patterns  I may try before redoing this.  I guess I would not recommend either as I will not use it again in my lessons.

Conclusion: OK pattern, but not top of my list. 


 Next up for review is this a out of print asymmetrical top  from Vogue.


This pattern came from my mother's pattern stash. It was uncut so I felt good about busting her stash as well as mine. My intention when I started out was to make the top and skirt. I made both, but am unhappy with the skirt. I will continue to work on it until it is at a point I can wear it.

I love the asymmetrical top with contrast binding. It was easy to make and came together quickly. I used a knit fabric I purchased at a resale store. The top calls for 1 1/2 yards of fold-over braid to serve as binding. I had never seen any in the local fabric stores, but I was pleasantly surprised to find that I had just that amount in my notions stash! It is applied like bias tape and went on without a hitch. I don't like that I am dependent on luck to find more fold-over braid for future tops.

I will make another top with this pattern. For the next one, I will add a strap on the bare side wide enough to hide my bra strap. With two little ones tugging on me, it is important be secure :).

Here are the photos of the top.


Next up is  Simplicity 2512 Cynthia Rowley Collection Tulip Skirt 

Here is the review followed by the photos.

Pattern Description: Misses' Skirts. Cynthia Rowley Collection Tulip Skirt

Pattern Sizing:4-12, 14-22 I made the 12 because I find this line runs small.

Did it look like the photo/drawing on the pattern envelope once you were done sewing with it?Yes.

Were the instructions easy to follow? Yes, the instructions are pretty clear and easy to follow.

What did you particularly like or dislike about the pattern? I like the tulip detail of the skirt.

Fabric Used: Cotton Poly blend

Pattern alterations or any design changes you made: I installed an exposed zipper in the back. 


 Conclusion: Fun skirt to make. I will make it again in the size 10.


Tulip Skirt detail


That is all for now.
Happy Sewing