Showing posts with label bias tape. Show all posts

Saturday, July 22, 2017

Bring On The Rain: Twister Mat Raincoat Upcycle

I wish it would rain! The skies keep rumbling with sounds of thunder, and clouds grow dark, but nothing happens. We want it to rain so Little Miss can play fun games outside in her new Twister mat raincoat.


Ever since I made my Twister Poncho a few years ago, she has been asking for her own. I resisted until now because my poncho was large enough to cover me and both kids easily. 


Everyone is getting bigger so it was time to make hers. I have been steadily collecting Twister games from resale stores when I come across them. They are available in retail stores, but you can't beat a resale price and opportunity to upcycle an item that may be one step from the landfill. I needed two for my adult poncho and two for hers, but one would have enough for her. I chose two because of design decisions I made. 

I used Simplicity 8305 for this project because it didn't require much modification to make it a raincoat. It is a combination of view A and C with modified the pockets.
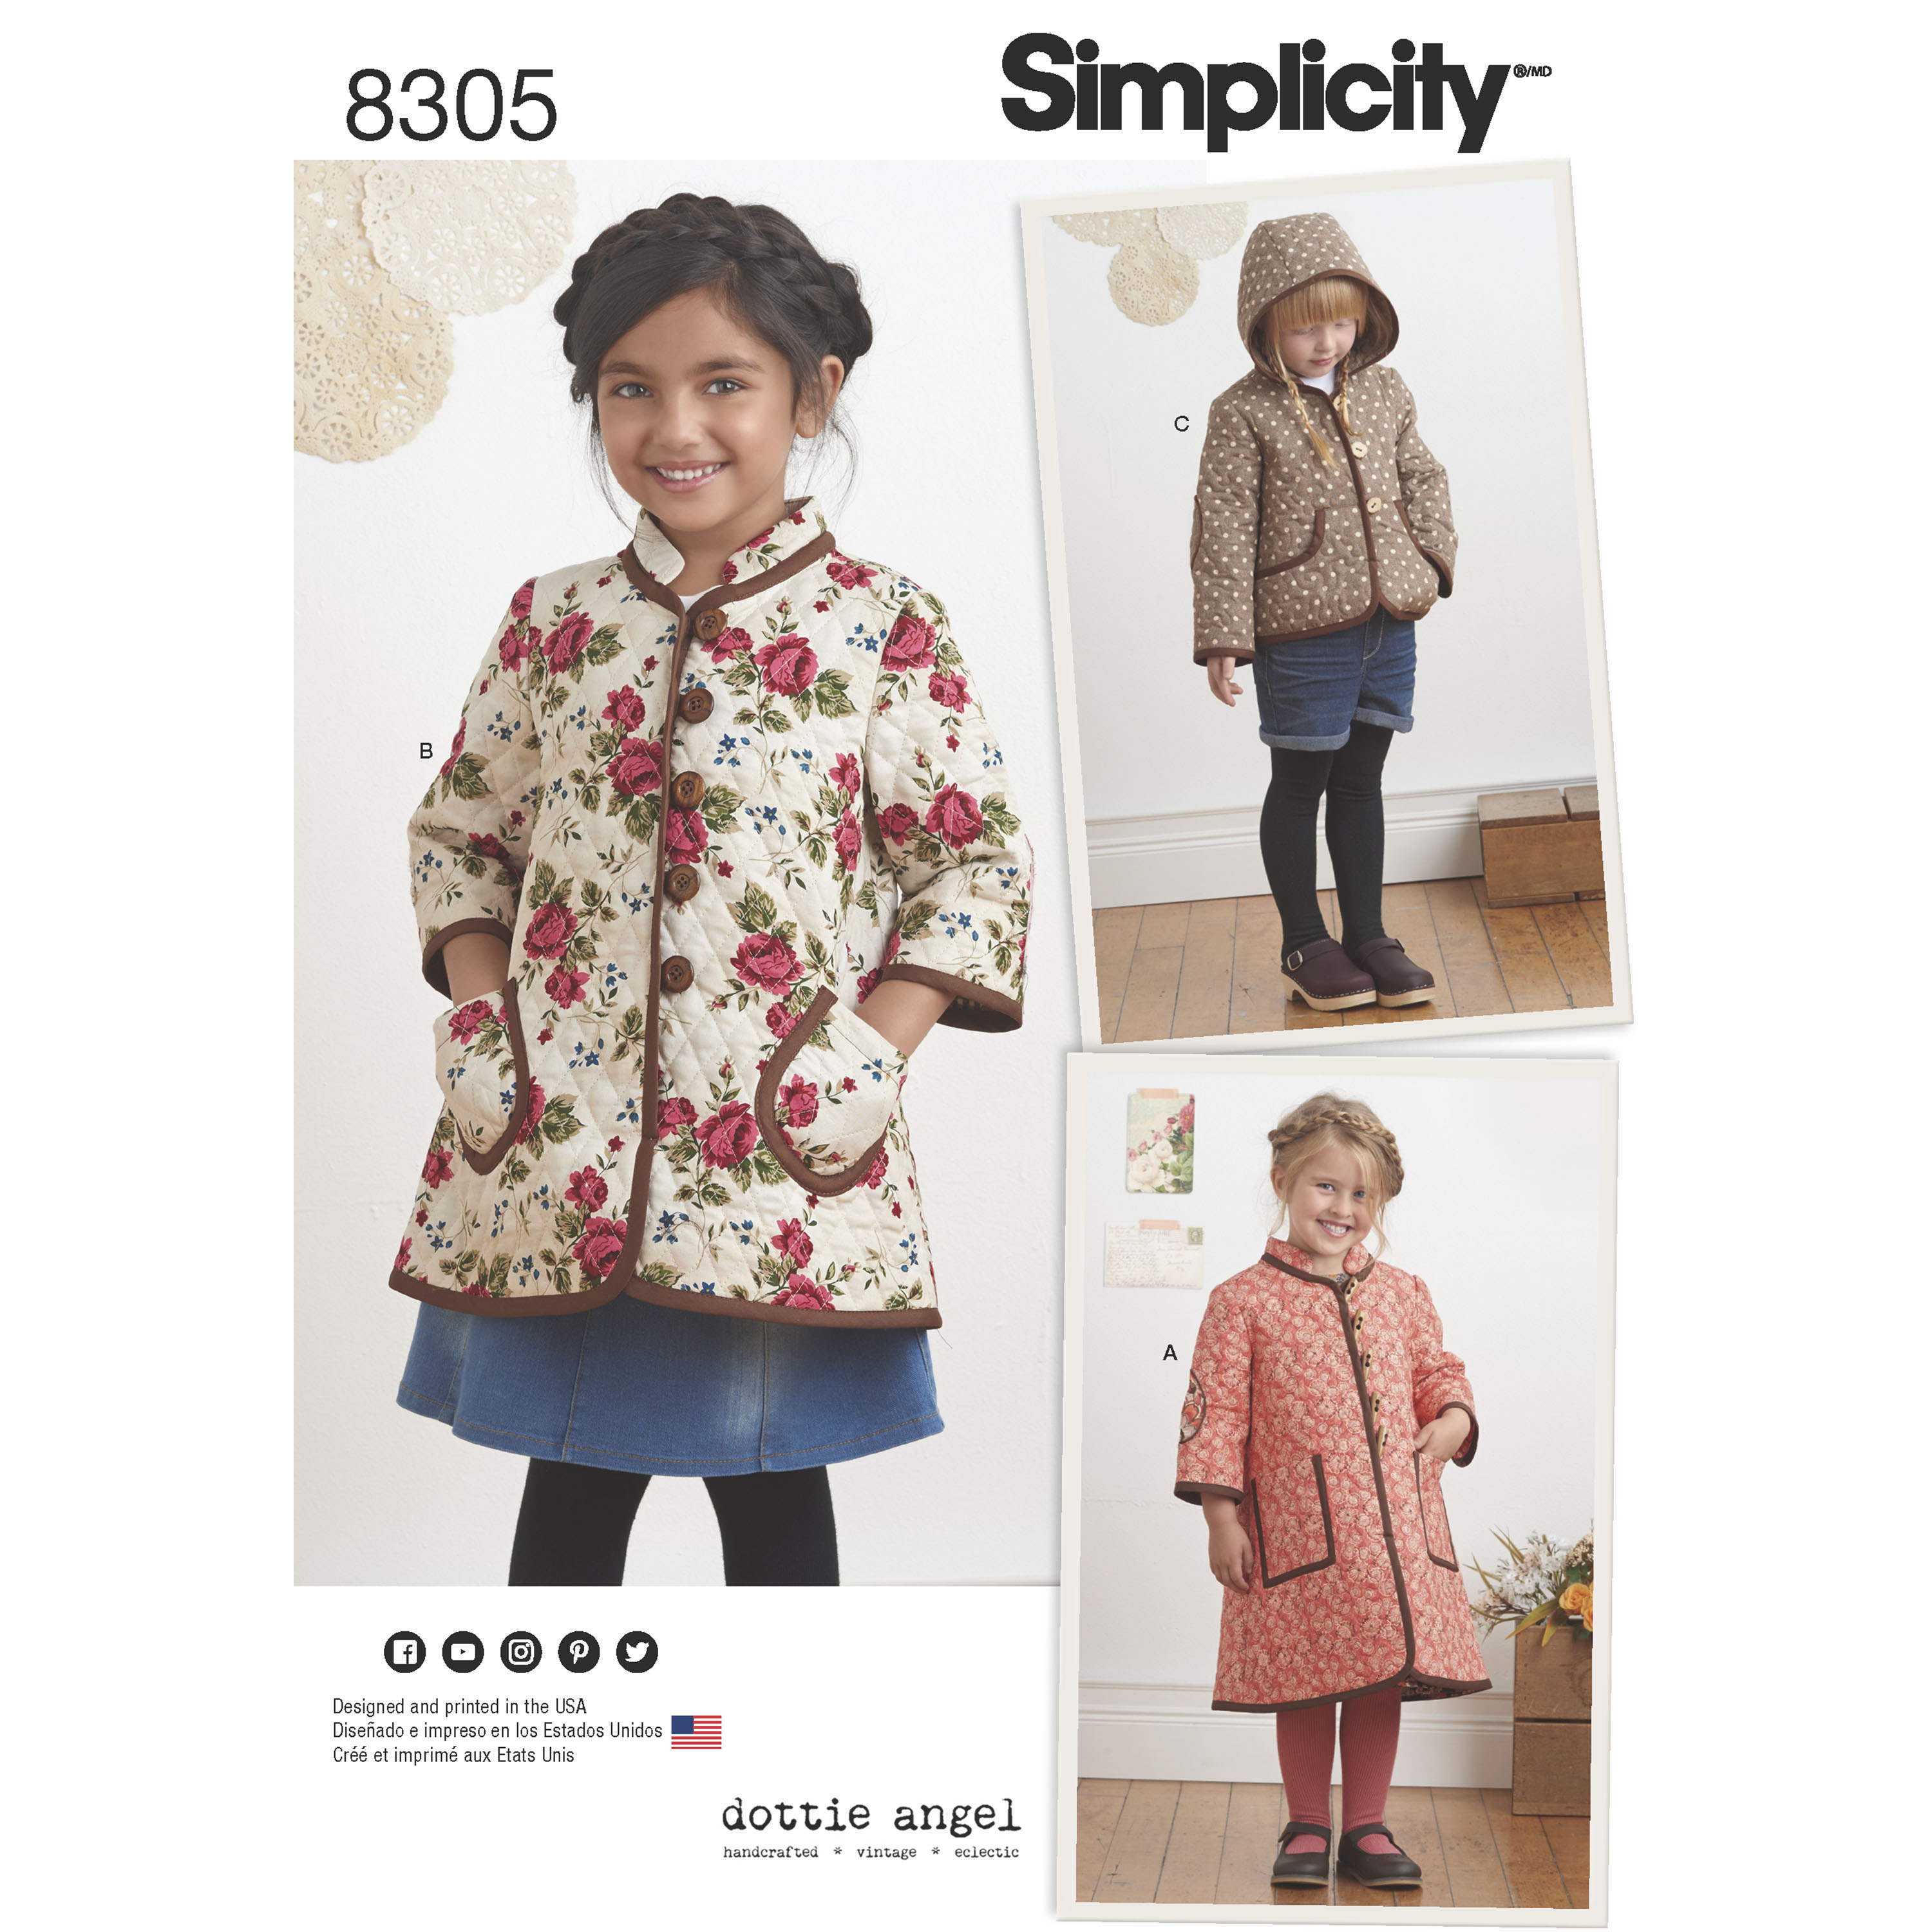
Image result for simplicity 8305

Working with the Twister mat requires a bit more focus and a few more tricks than working with fabric. You don't want to melt or tear the plastic. Ripping seams due to mistakes will result in many perforations in the seams so I had to take time. This was not a fast, complete in one sitting make. It took about 2 days of work to come together and we love the result. 

  • Toss it in the dryer on express cycle with a damp paper towel to get the wrinkles out before cutting. Check periodically to make sure it isn't too hot. 
  • When pressing during construction, press the lining side with a low iron
  • Underline the Twister fabric with lining fabric so they behave as one. I used four colors of thread and my serger for this. 
  • Use clips instead of pins to hold the fabrics together
  • Sew with jersey/ball point needles or any with a fine point


I learned  a lot from making the poncho for myself and customers. I took those lessons and added fun touches to this raincoat.


Little Miss is enjoying a summer of color with purple dyed hair. I took advantage of her love of color and added them every chance I had.

The first added color feature is multi-colored bias binding with rainbow color thread stitching


To make the multi-color binding:

  • Begin with purchased extra wide double fold bias tape
  • I cut 12-inch sections of all of the colors
  • Open the ends and pin, right sides together, raw edges even
  • Stitch the ends together
  • Press seams open
  • Refold along original foldlines and press


To that, I also added mismatched buttons and button loops


Alternately placed bias-trimmed pockets   
                                   

I really like the three-part hood of this pattern. It allowed me to showcase key aspects of the game mat.

A "Stockin' Feet Game"
                                                     

 "Twister"                                                                                                                                                                                                                                                                                                                 
                           
 "The Game That Ties You Up In Knots"
                                                                                                                                                                    

I am ridiculously thrilled with the lining fabric and how perfect it is for this project! I love the primary color hand prints on this fabric that I got at an estate sale. It is perfect for a Twister raincoat!

     
It is hurricane season in Texas, so I know the rains will come. In the meantime, a little plea to the sky cannot hurt right?

      
 Well, that didn't work. We will enjoy the sunny day anyway.


Happy Sewing,
Bianca

Tuesday, June 14, 2016

Playing Around With Bias Strip Applique Again


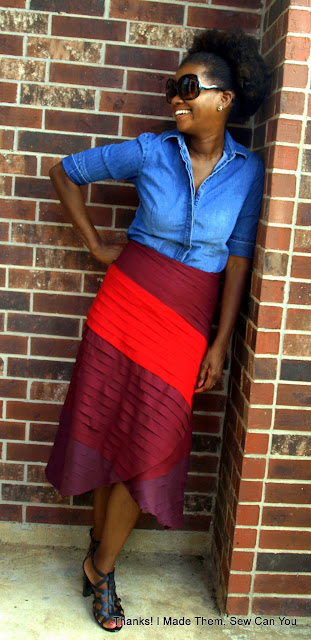
So, I was stumbling over my spools of bias trim wondering what my next project with them would be. I loved the skirt I made for Little Miss and decided I wanted one for myself.


This time, I decided make mine a bit different and used out of print McCalls 4457 pattern as my base.

I cut the pieces for cotton in my stash. I chose fabrics I would likely not use for anything else because they would be covered by the bias strips.  After sewing the long seam, I drew lines 1" apart and applied the strips 1/4" from the the edge of the strip. For this skirt, I only sewed one end of the strip down allowing the other to hang free. I began sewing at the bottom of the skirt allowing the succeeding strip to overlap the one before. 


I sewed past the edge of the fabric and serged them down when they were all done. 
I even like the stitching on the flip side.


Overskirt and underskirt
I got to this point of the construction and did not know what to do with the upper portion. I thought going in the opposite direction would be interesting so I changed direction. It was distracting to look at so I unpicked it all. I decided to continue on the same path as before using the color from the bottom.


I joined the underskirt to the outer skirt allowing it to be lined with wrong sides together. I installed an invisible zipper and applied facing to the waistband.


The last thing to be done was the hand-sewing of the hem. I slip-stitched the entire length of it by securing it to the lining. This was a tedious, but worthwhile task to not have any stitches show on the outside. 


For a project that I started without a complete vision, I am very pleased.
This skirt by the numbers:
✂ Base fabric: 3 1/8 yards 
✂ Rows of bias: 54 
✂ Shortest length: 2.5" 
✂ Longest length: 47"
✂ Total length of bias: 47 yards. 
✂ Length of hem to hand sew: 5.5 yards 

I love the lines of the bias and the texture it gives. The unfinished edges will weather with time, wear and washing. I am excited to watch this fall apart in the best way.


The completion of this shirt coincides with the PR Skirt contest so I have entered it. We will see how that goes.


I have yards and yards of these colors of bias as well as green and blue still. I am excited to see how I use them next.


Happy Sewing,
Bianca

Thursday, March 31, 2016

The Bias Tape Dress is Done! Just in time for the Dance!


Slow and steady wins the race they say. I am happy to take on long hand-sewing projects, but I like my machine projects fast. This dress took 2.5 weeks of constant sewing in every available moment and I am pleased with every second. I began this project after making Little Miss the bias tape skirt and coveting hers. I have been charting the dress making progress on my Instagram  and have appreciated the cheering on. 

It all started with a few thrifted spools of bias tape, The Party Dress Book and an invitation to a dance fundraiser. I rarely have occasion to wear a dress like this and was thrilled when the stars aligned for me to make this. 


After having used the reds for the previous skirt, I opted to use the blue and green bias with my project. The colors as they were felt a bit flat to me, so I painted them. I used multiple colors of metallic spray paint to add dimension to to the plain strips. 


I searched my stash for a print fabric to add to the blue and green bias. I found "Paisley" by Amy Butler's "Love" line. 


I cut a bajillion strips of the bias fabric the base fabric from the skirt pattern in the book. I decided to make separates to get the most use of the pieces in the long term.


After making the skirt for my daughter, I was looking for a faster way to apply the strips to the base fabric. I used an extra large twin needle to allow me to sew two lines of stitches at once. I used blue, green, pink and white threads. The colours coordinated with the print and would not be a glaring contrast. It took a few rows to get a hang of sewing double strips, but once I did, it went relatively fast.


After sewing the strips to the skirt, I applied a basic waistband and an invisible zipper at the center back.


The skirt is pretty full, but I wanted to be sure it maintained its' fullness with movement. I knew I needed a petticoat. I found one at an estate sale that needed some modifications and repair. 


Vintage petticoat.

I added six layers of tulle to the petticoat I may add more in time, but it was an unwieldy task .

Skirt with petticoat under.
After making the skirt, I still needed a pattern for the top. I found Simplicity 4885. It has the look of the bodice of the dress in the book, but is designed as separates. This meant I would not have to modify it like I would have for the top from the book. 


I placed the strips on the bodice, added a full lining and an invisible zipper.

Full lining
A note on the bodice. The photo on me on the first photo was taken when I thought I was done. I looked at the pics and decided I did not like the curve along the bust line. I deconstructed it and reworked the print strips to the positions as seen in the final photos. My suggestion to you if you make this is begin your strip placement at the bust line and then sew above and below that strip. It may reduce the chance of curving. 

Simplicity 4885

The completed ensemble.
Little Miss saw the skirt on my custom dressform BIRA and asked if this was for a contest. I was not making it for one, but after checking Pattern Review, I saw this qualified for the Bargainista Fashionista contest there.  You get to make a designer garment at a bargain price. The contest does not factor in labor, so I was able to make my dress for $22!
I called Mary Adams to find out the cost of the dress as it was not available online. After making this, when she said $1700, I was not surprised! I would charge that and more for my less than wonderful version! :)

The contest review asks specific questions and you can read my review here. It includes some other details that would have made this already long post, longer. If I have missed something please let me know. I have been in this dress for weeks and feel like I am coming out of a fog.

The dance was last weekend and we had a blast!


I am so happy I made my dress. In a sea of traditional black tie dresses, I am happy I stood out in my strip pieced dress.


 There were a few bug eyes when I shared, that I made this. 


This dress is fun to wear and fun to make. 


Happy Sewing,
Bianca